In the construction industry, the term "kitchens" refers to kitchen units and their individual components, including elements with technical installations for water supply and wastewater disposal, such as sinks, dishwashers, and similar fixtures.
This article primarily focuses on the construction of individual kitchen unit components—such as base and wall cabinets, ovens, dishwashers, countertops, sinks, cooktops, etc.—and their combinations.
Keywords: Cooking, Food, Furniture, Kitchen-diner, Interior design, Furniture, Built-in, Cabinet, Sink, Baking, Block
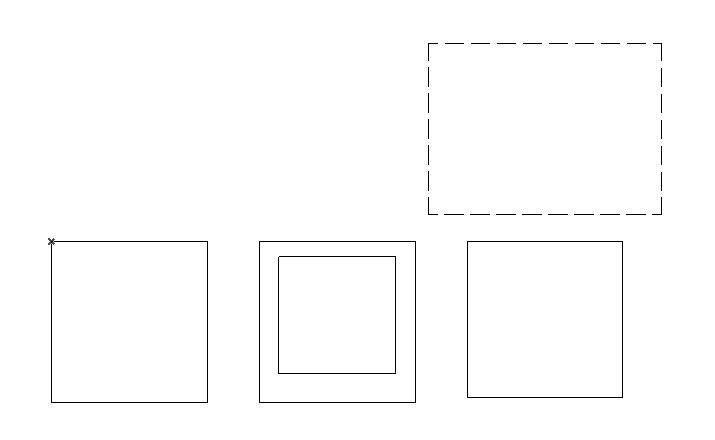
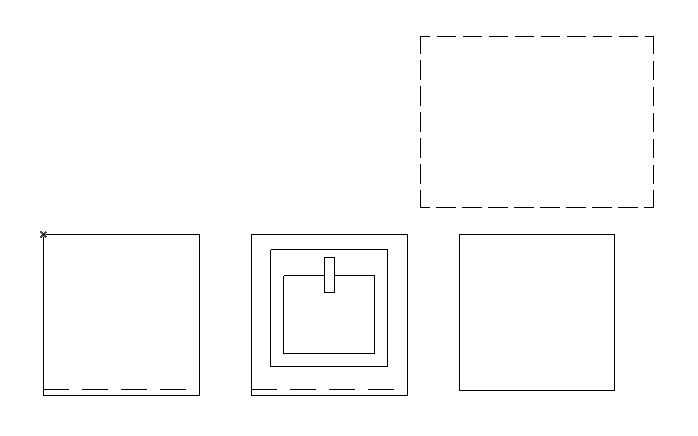
At this stage, there is no need to create kitchens yet. To get an initial idea of the space required for kitchen units, you can place 2D elements consisting of simple 2D lines.
At this stage, there is no need to model any kitchens yet. To estimate the space requirements, 2D elements consisting of simple 2D lines can be placed, just as in the >Conceptual Preliminary Planning phase.
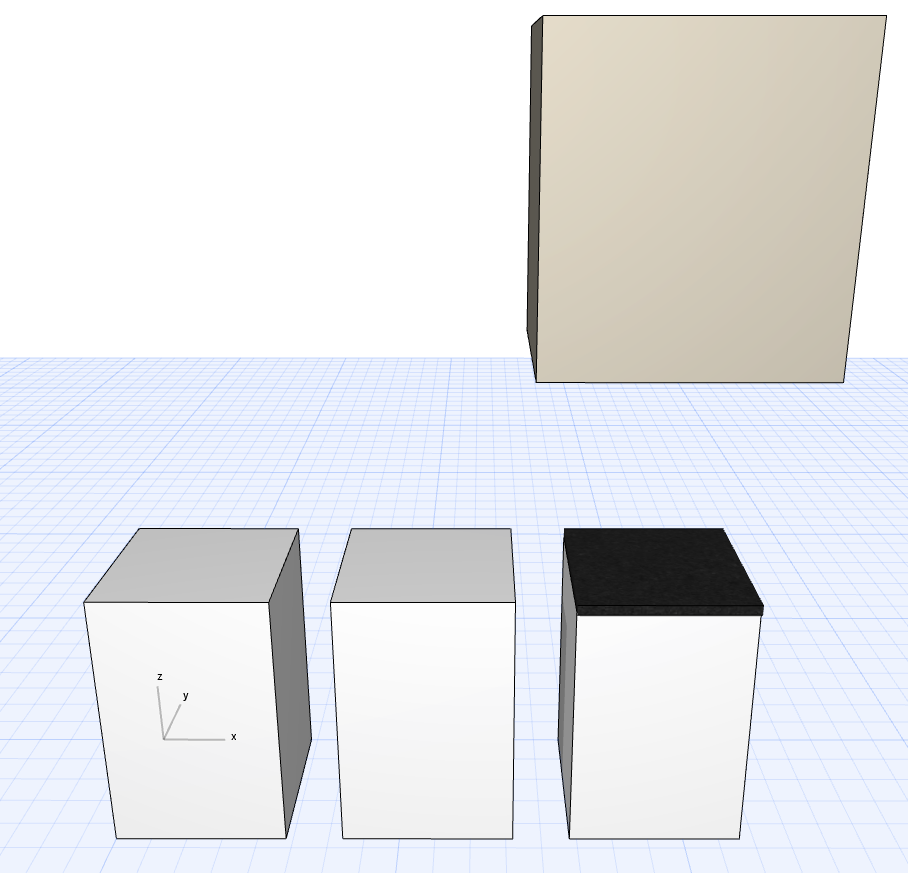
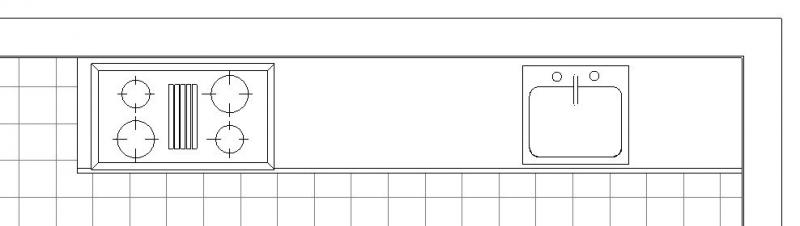
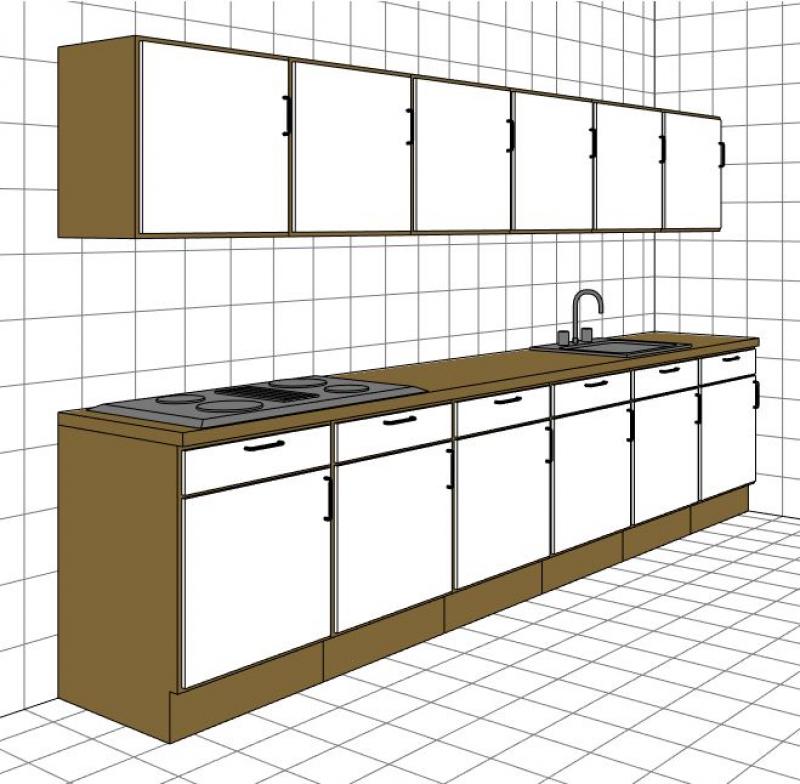
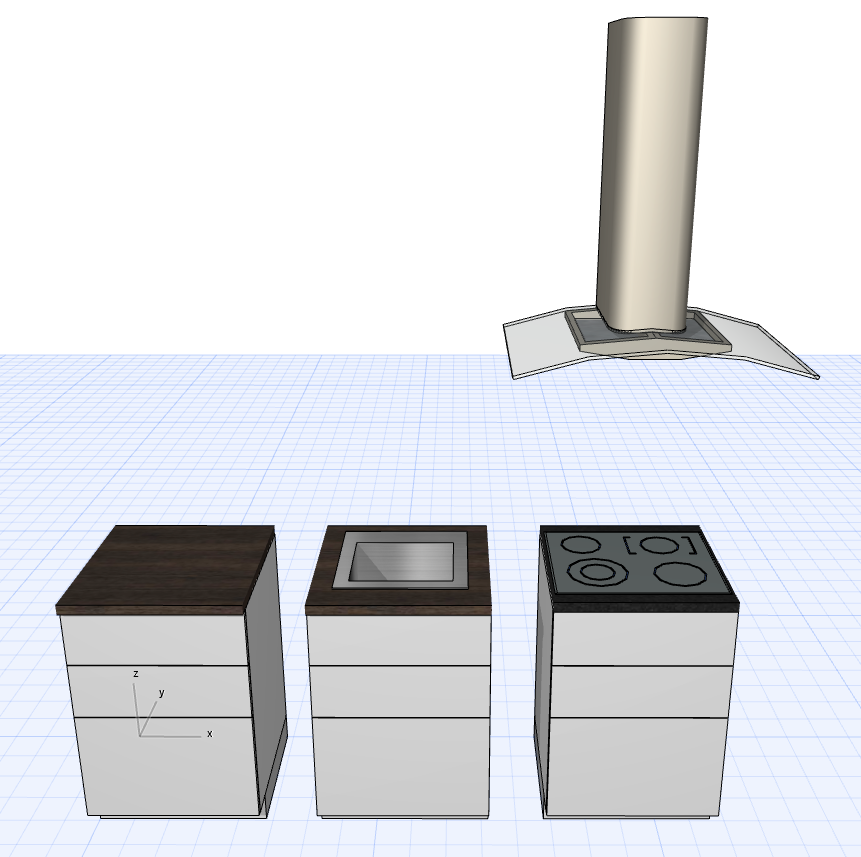
In this phase, kitchens are modeled in 3D for the first time.
Presentation

Floor plan
3D model
Features
During this phase, kitchens are created. The required features are generated through the modeling or creation of the objects.
The following characteristics are defined in this phase:
- General: Name (name of the kitchen unit)
- Generator: Geometry (Width, Depth, Height, Height to Top Edge)
Labeling
Kitchens are not labeled at this stage.
Instructions
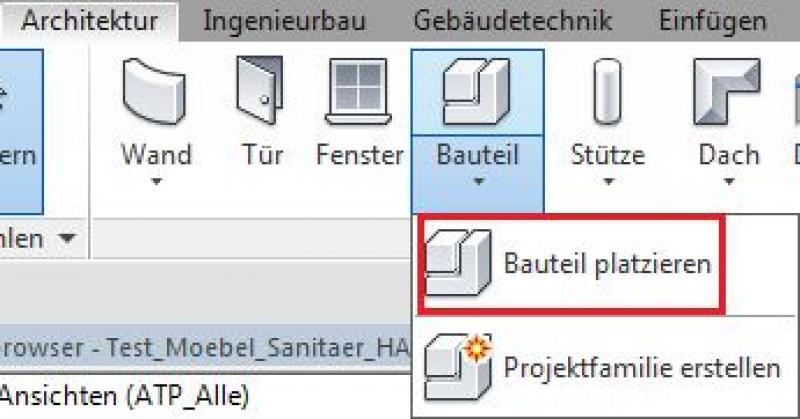
In Revit, kitchens can be constructed using families from the Furniture, Joinery, or Plumbing categories and are placed using the >Architecture >Part >Place Part command, just like all other interior elements (such as furniture). Since they do not belong to the system families palette but rather to the so-called external (i.e., “loadable”) families, they must be loaded from Revit Content as needed using the >Insert >Load Family command.
Instructions for kitchens:
Command for loading kitchen families:

Classification of kitchen types:
The kitchen content included with Revit is structured in such a way that individual components can be assembled in a modular fashion. The individual elements have the following meanings:
- Countertops: Top panels of kitchen units at counter height (some with a sink or cooktop)
- Appliances: built-in kitchen appliances such as ovens, dishwashers, etc.
- Tableware
- Tall cabinets: Cabinets taller than 1.4 meters
- Kitchen units: combination of base cabinet and countertop
- Mixer faucets: = colloquially known as water faucets
- Rinsing
- Base cabinets: Cabinets under the countertop (with a height of
- Wall cabinets (=upper cabinets): Cabinets above the countertop
- Accessories: e.g., side panels
Overview
The basic modeling of building elements in ArchiCAD does not differ across the various design phases; however, the amount of information (alphanumeric and detailed, depending on requirements or manufacturer specifications) increases with each design phase.
Furnishings are placed in ArchiCAD via Object Libraries > Furnishings. These objects are both 2D and 3D elements. They are placed in the floor plan and are displayed accordingly in sections, elevations, and perspectives.
For general information on how to use the Object tool, please refer to the basic documentation provided by Graphisoft in the Help Center.
This documentation is based on the official template file 01 ARCHICAD 25 Template.tpl from the ARCHICAD 25 AUT version—library elements may vary from country to country.
The level of detail for objects can be adjusted according to the phase using the model display options. An important prerequisite is that the 2D and 3D display options in the object’s element settings have been set to “According to model display.” The following settings should be applied during the design phase.
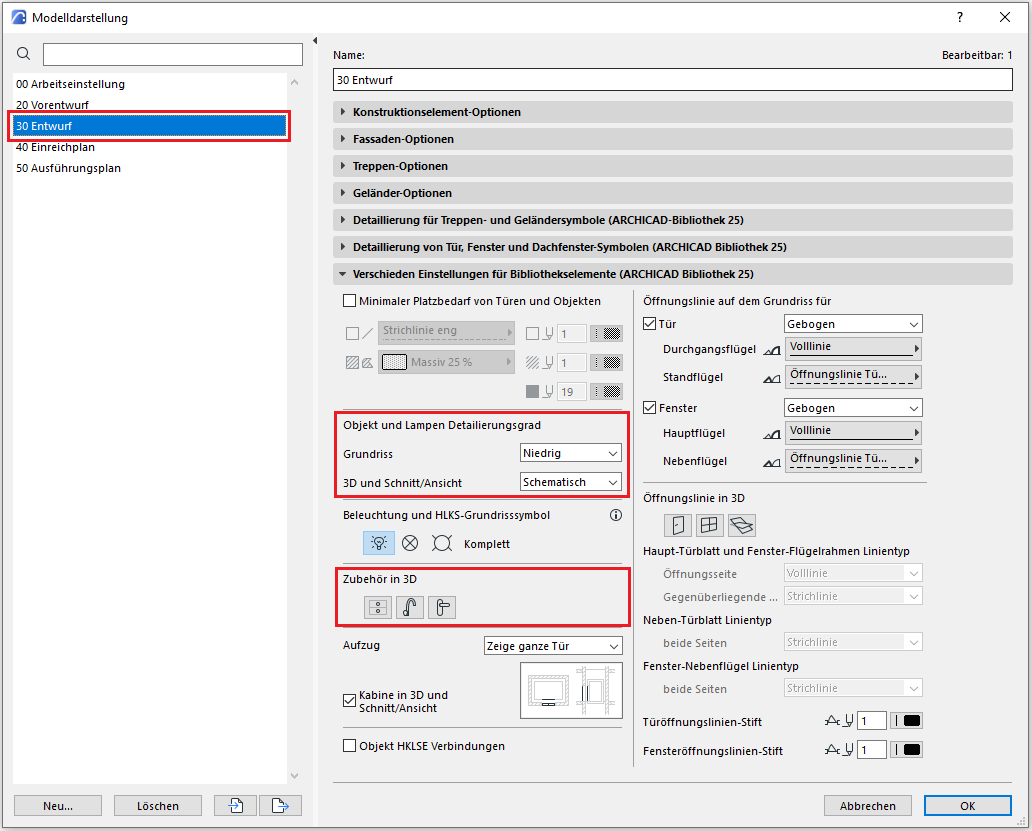
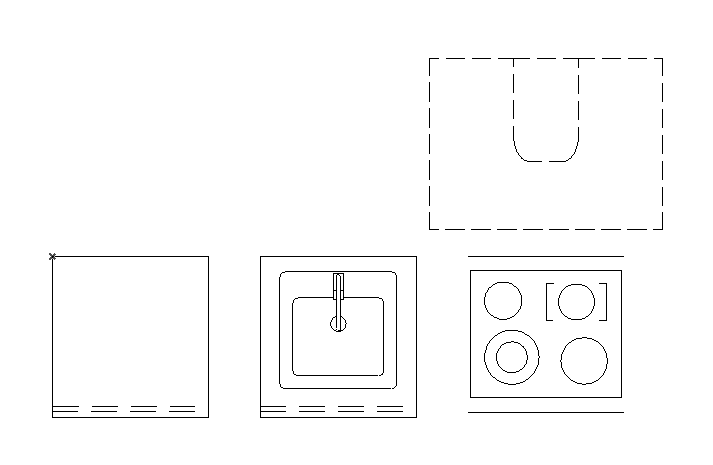
The level of detail should be set to Low and Schematic. Accessories should be hidden in 3D to reduce the number of polygons.
Furnishings are used for illustrative purposes, to determine usage assignments for connection points, or to define furnishings—since they are neither structurally relevant nor space-defining, they are classified as Building Element Class II.
It is important to consider what type of object is to be placed—this determines which layer to use:
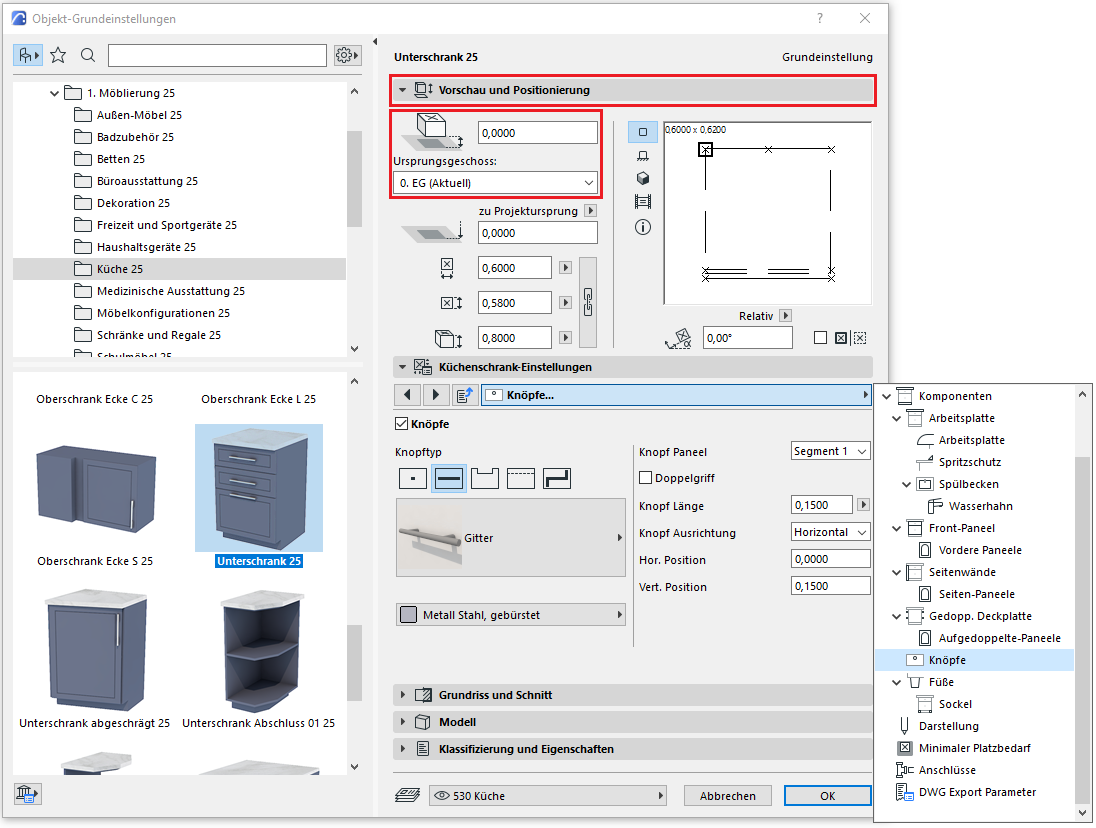
For kitchen layouts, it is recommended to create and use a Level 530 kitchen.
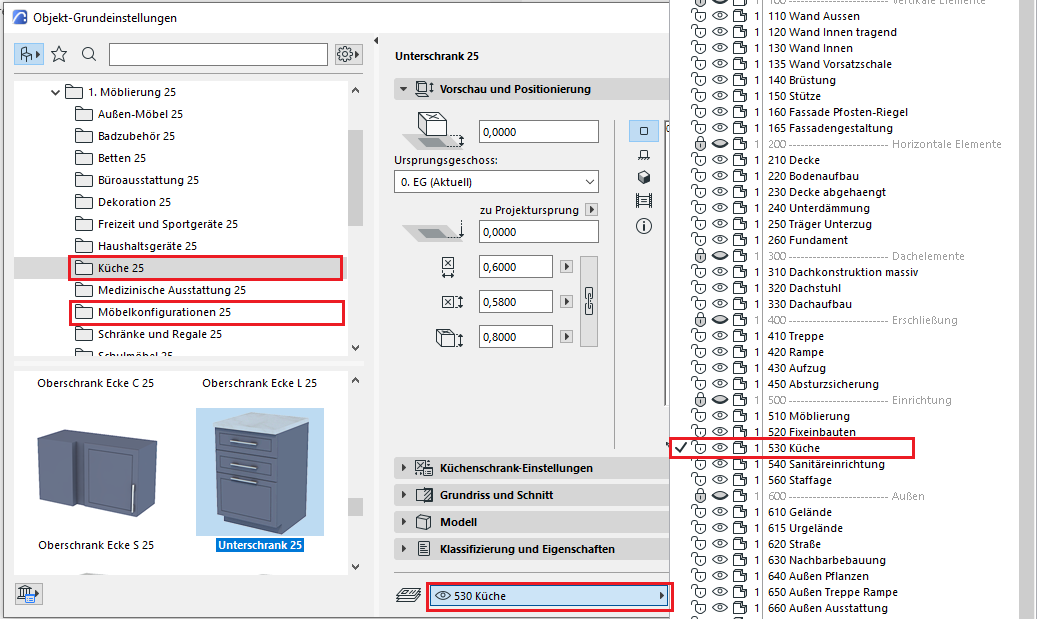
Preview and Positioning
When placing a piece of furniture, you must take the floor levels into account—the top edge of the floor slab is at floor level zero, and the floor structure is above that.
Note: The piece of furniture is placed on the floor where it was originally located, plus the height of the subfloor.
Custom settings
The individual settings for each object vary by user and are not described here.
Model
In the Model section, surfaces can be overridden manually or individually and should therefore be treated on a per-object basis.
In the Graphical Overwrite Styles, there is a preset style that overwrites all objects in 3D to create a consistent model.
Classification and Characteristics
The element classification is the first definition in the Classification and Properties section—see also Classification. Selecting a classification causes only those properties to be displayed in the lower field area that are available for that classification according to the IFC properties.
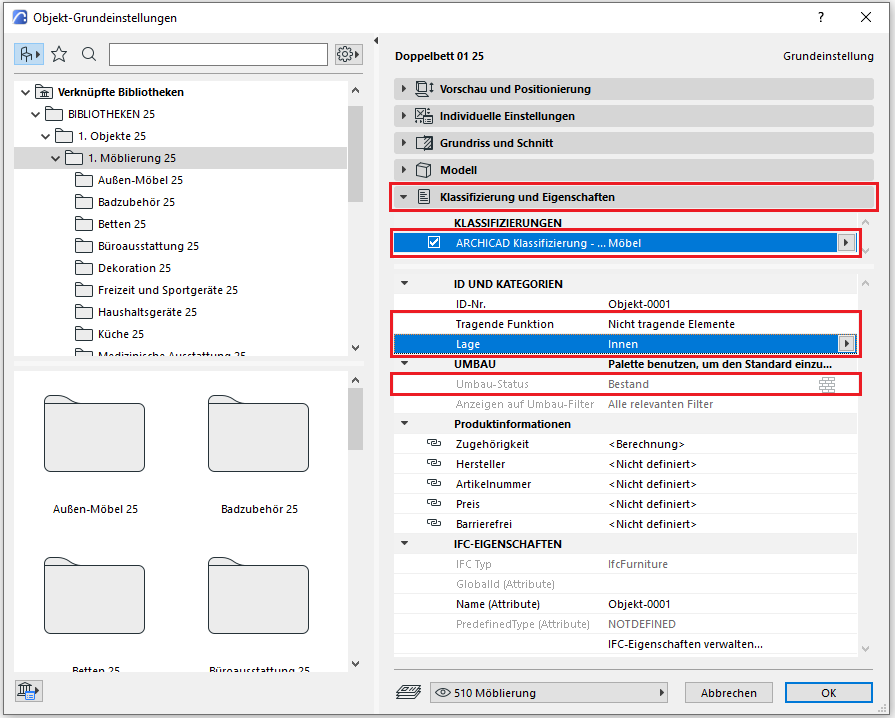
Note: Care must be taken to ensure that the correct classification is defined for specific facility objects:
Standard furnishings are classified as furniture, whereas a distinction must be made in the case of bathroom and kitchen fixtures:
- Toilets, showers, bathtubs, and washing machines are classified as “Building Services Components (General)” in ARCHICAD.
- Ovens, cooktops, refrigerators, and sinks should be classified in ARCHICAD as “Building Element – Any.”
The reason for this is that these objects are correctly recognized and classified in other programs, such as Solibri Office.
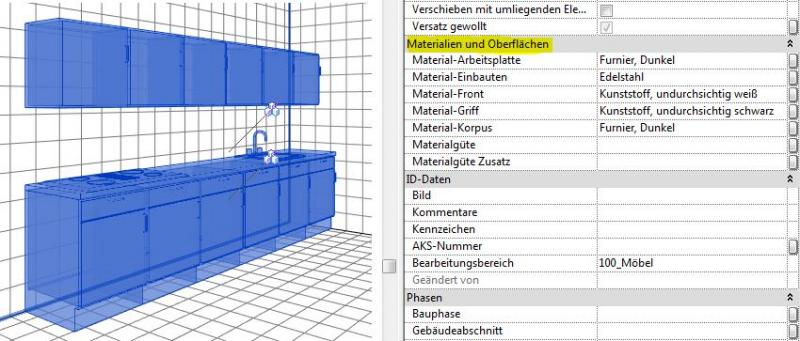
In this phase, kitchens are enhanced with surface definitions (materials).
Presentation
Floor plan
3D model
Features
The following features are also required in this phase:
- Materials: Surfaces
Labeling
Kitchens are not labeled at this stage.
Instructions
The level of detail for objects can be adjusted according to the phase using the model display options. An important prerequisite is that the 2D and 3D display options in the object’s element settings have been set to “According to model display.” The following settings should be applied during the submission phase.
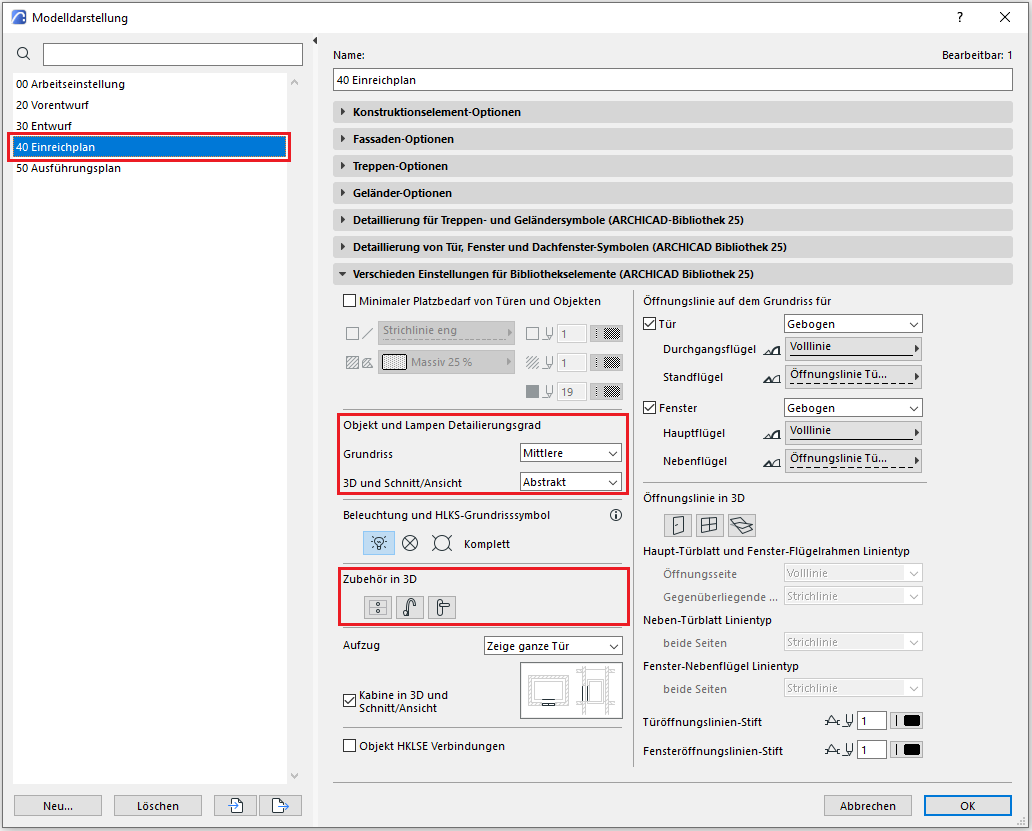
The level of detail should be set to "Medium" and "Abstract." Accessories should be hidden in 3D to reduce the number of polygons.
The basic modeling of building elements in ARCHICAD does not differ across the various design phases, nor does it differ from the modeling of other ceiling types.
The new features and parameters for this phase must be added in the appropriate sections of the component's settings dialog.
The description of the settings dialog and the corresponding procedure can be found in an earlier section of this article.
During this phase, the kitchen details are supplemented with information provided by the manufacturer.
Presentation
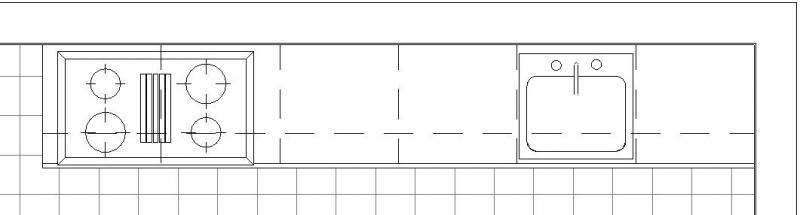
Plan view (cross-section)
3D model
Features
The following features are also required in this phase:
- Manufacturer information: Manufacturer, product name (product number), dimensions, etc.
Labeling
The labeling is created with the appropriate manufacturer information as required.
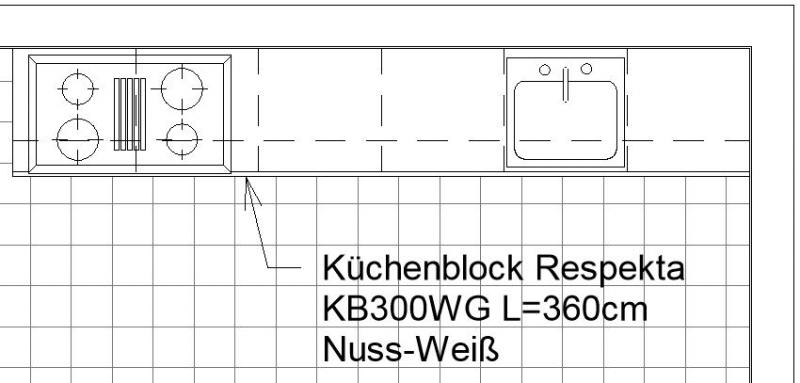
The labeling and dimensioning of the building element should always be associative. Instructions on how to do this in ARCHICAD can be found in the relevant articles.
Instructions
These measures primarily concern labeling and are listed in the previous section >Labeling.
The level of detail in kitchen design:
When modeling kitchens in BIM models, there are generally four levels of detail:
- Kitchen elements need only be included as placeholders: For this purpose, external, non-reviewed families, BOA families (kitchen blocks), and families from the Metric Library may be used. An external kitchen planner will handle the further detailing.
- Kitchen elements must have an explicit plan view (2D symbols) and be included as solid objects (industrial construction, research): For this, the families must be adapted for 2D representation.
- Kitchen elements must also be assigned materials (for renderings or approximate quantity takeoffs, e.g., for retail, residential construction): For this, external families may need to be supplemented regarding their surface material assignments, which requires adding material parameters.
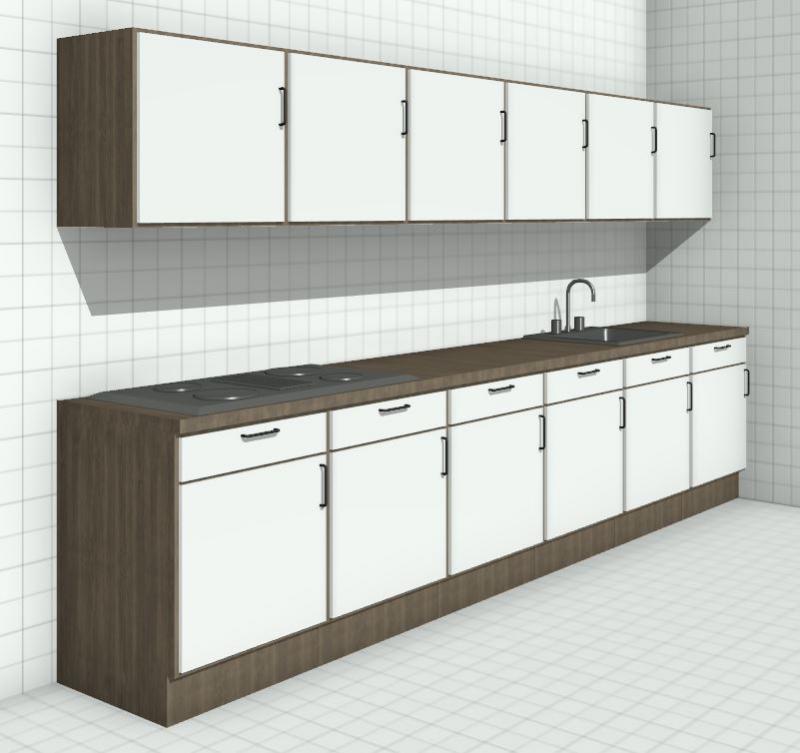
- Kitchen elements must be precise technical models that meet the requirements of building owners and/or specific standards and serve as the basis for bills of quantities (e.g., high-end residential construction): For this purpose, all component surfaces in the families must be assigned precise material specifications that can also be used for high-resolution and realistic renderings. This means that new kitchen families must be created for this project using the parameters specified in the BOA list.
Based on this information, the level of detail required for kitchen families varies depending on the specific project.
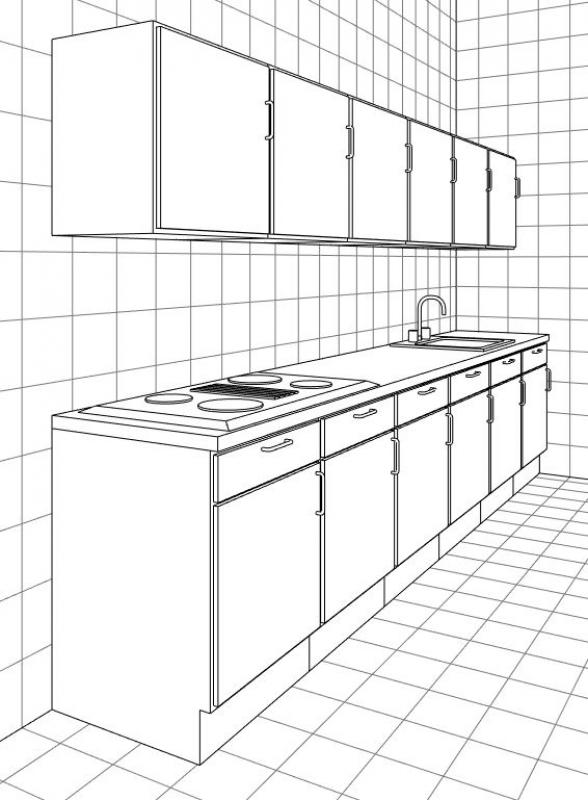
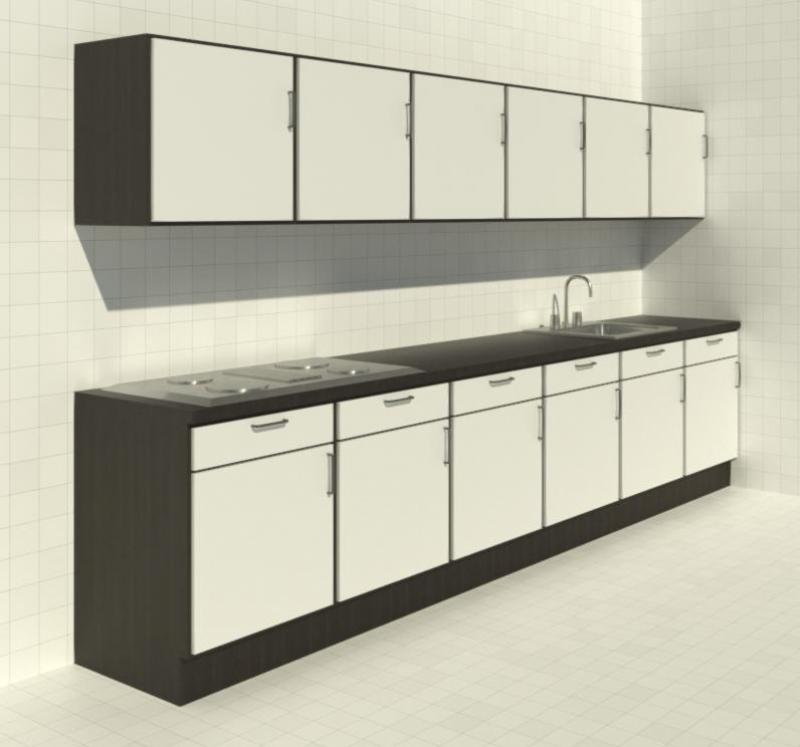
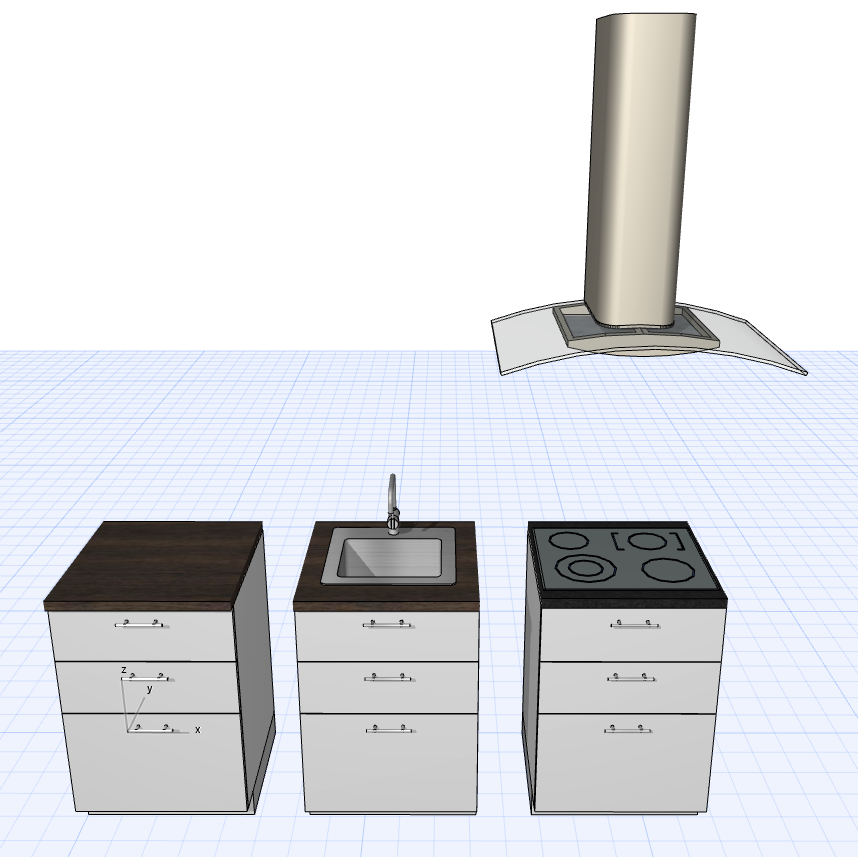
Sample image of a highly detailed and fully developed kitchen collection in Revit (rendering):
The level of detail for objects can be adjusted according to the phase using the model display options. An important prerequisite is that the 2D and 3D display options in the object’s element settings have been set to “According to model display.” The following settings should be applied during the Execution phase.
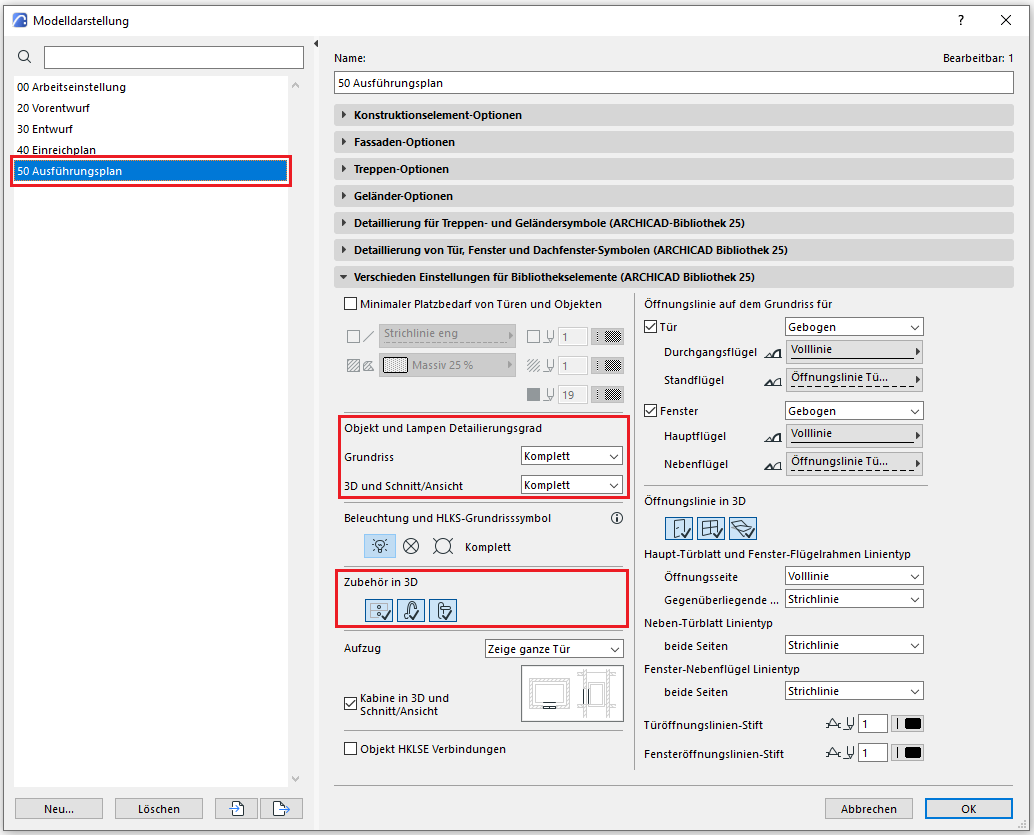
The level of detail should be set to "Complete." The accessories should be displayed in 3D.
The basic modeling of building elements in ARCHICAD does not differ across the various design phases, nor does it differ from the modeling of other ceiling types.
The new features and parameters added for this phase must be entered in the appropriate fields in the component's settings dialog.
The description of the settings dialog and the corresponding procedure can be found in an earlier section of this article.

Unfortunately, this content is available only to our Pro users.
If you'd like to read the full article, try the Pro account or become a Pro user.