Strictly speaking, fire and smoke compartments are not standalone model components, but rather a single attribute within rooms that can be visualized in color using appropriate presets in floor plans. They are defined no later than the design phase.
The purpose of fire compartments is to prevent fire and smoke from spreading to adjacent parts of the building and to neighboring buildings.
The purpose of smoke compartments in buildings is to prevent the spread of smoke within the building and to allow sufficient time for the rescue of occupants.
Rooms are used to represent the zones. The zones are visually distinguished using a color scheme based on a predefined parameter. A parts list, whose content also reflects this parameter, supplements the corresponding plan with the relevant alphanumeric data—such as the area specifications for the individual zones.
Instructions
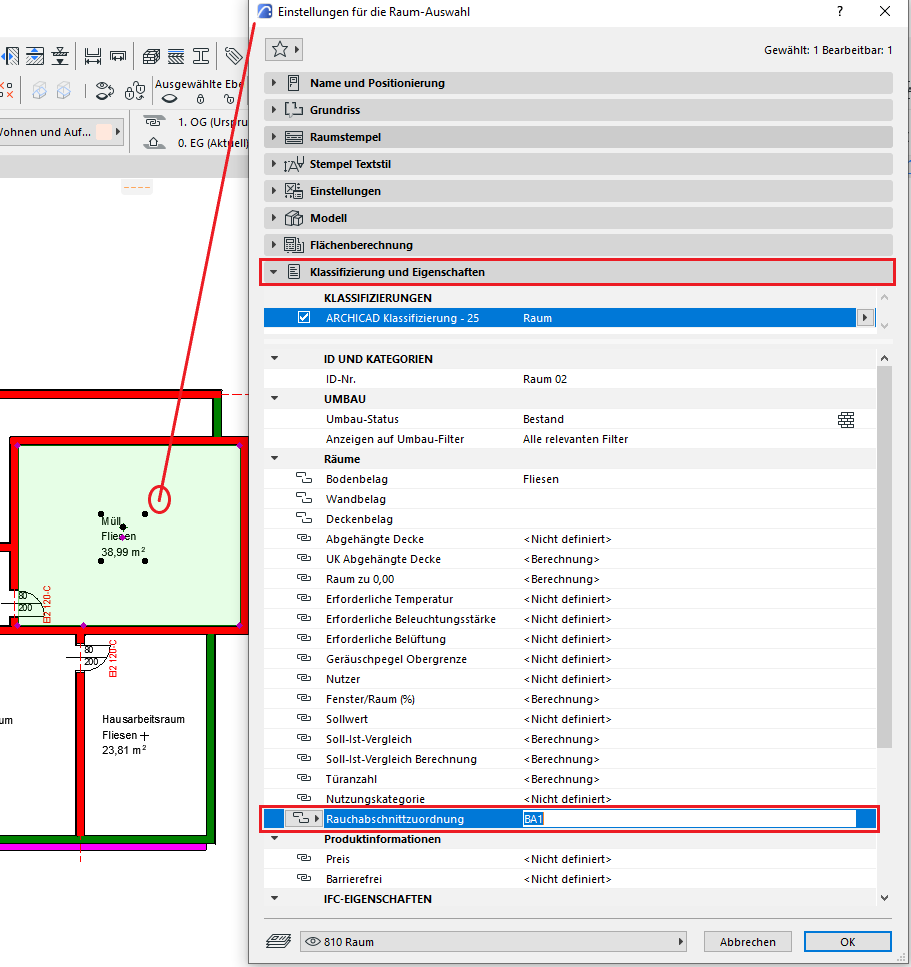
First, we need to determine which parameter will be used for the mapping.
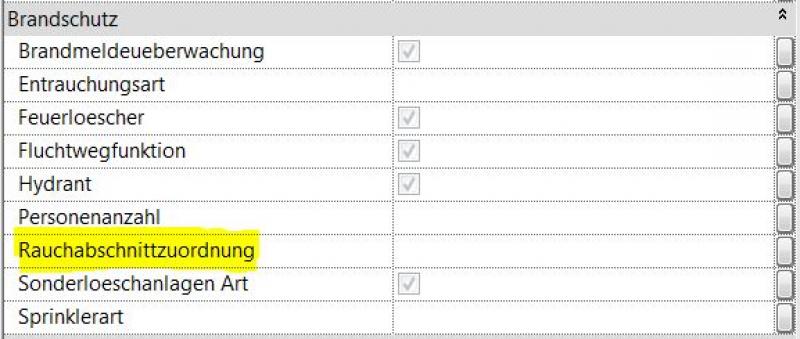
Let's assume that rooms have the instance parameter "smoke compartment assignment."
This property is assigned to the rooms by setting this parameter.
Color scheme for fire/smoke compartment zones:
In the next step, you can either assign an existing color scheme to the "view," duplicate and modify an existing one, or create a new one.
The best way to assign a color scheme to a view is through the Properties window of the selected view.
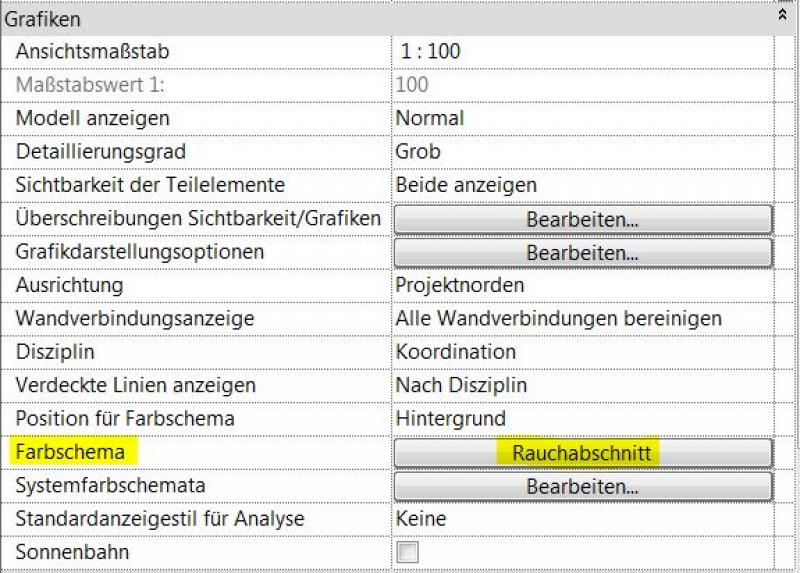
Existing or already assigned color schemes can be edited in the view's Properties window using the Color Scheme parameter. Selecting this parameter opens the "Edit Color Scheme" window.
Note:
Changes affect not only the selected view, but all views to which the modified color scheme has been assigned.
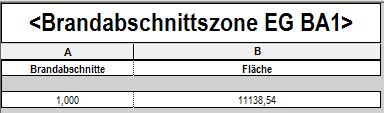
Create individual component lists for the fire compartments as zone labels and place these tables on the plan:

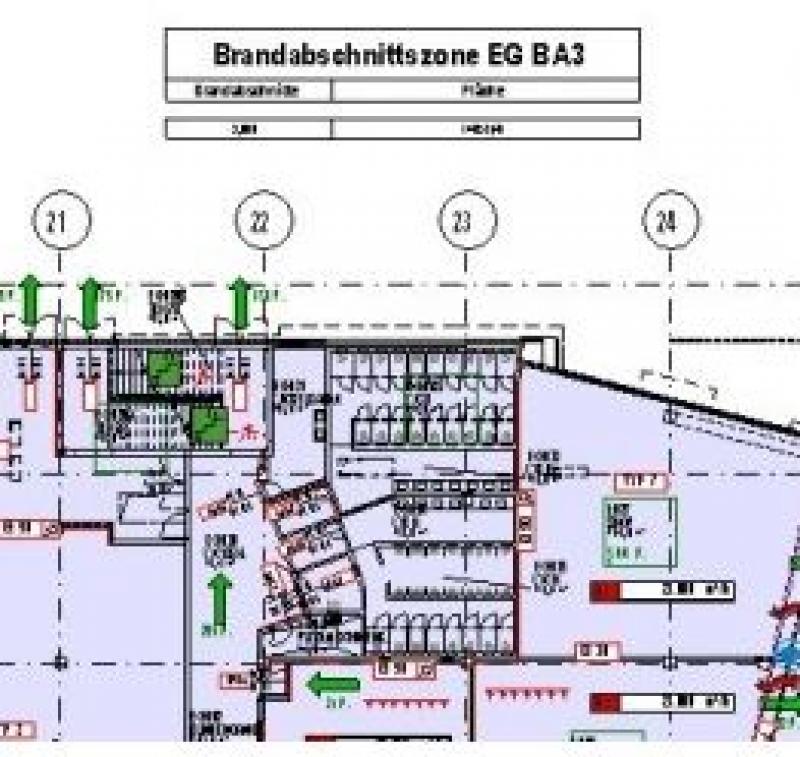
Example of use:
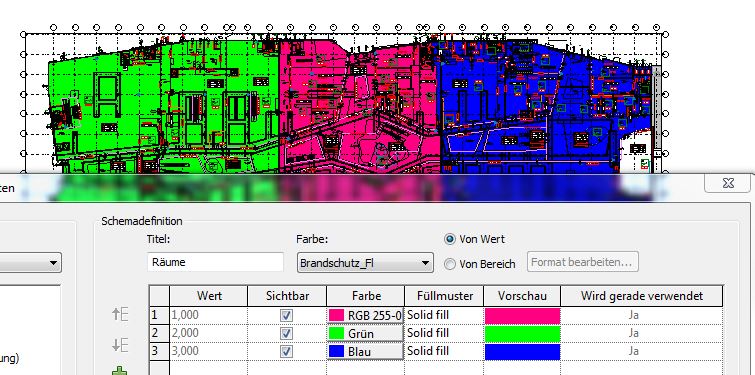
This is what a pre-designed color scheme for fire and smoke compartments might look like.
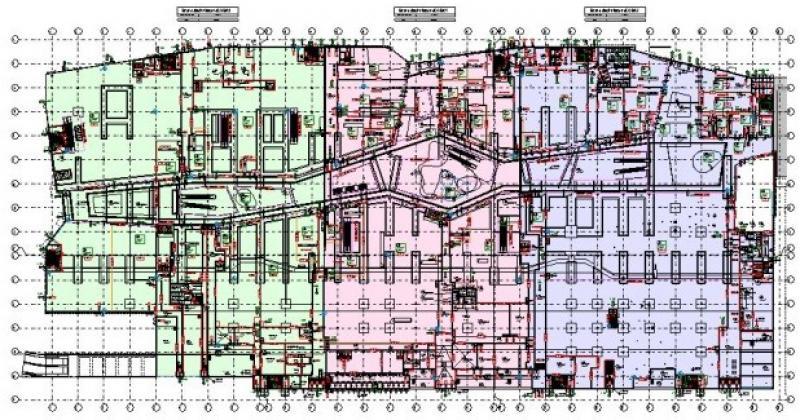
.
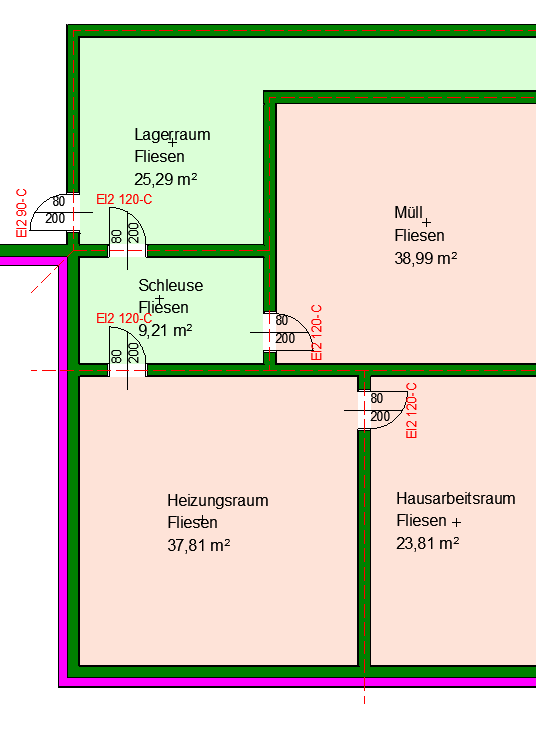
The Room tool is used to map the zones. The distinction is made by applying a graphical overlay that refers to a previously defined property. An evaluation that also reads this property completes the corresponding plan with alphanumeric data—such as the area specifications for the individual zones.
Instructions
First, we need to determine which property will be used for the mapping.
Let's assume that rooms have the "smoke compartment assignment" property.
This property is assigned to rooms. To learn how to create and assign a new property, see the following article: Property Manager in ArchiCAD
Graphical overlay for fire/smoke compartment zones:
In the next step, a graphic overlay is applied to the section.
The best way to assign an overlay to a section is through the Properties pane for the selected section.
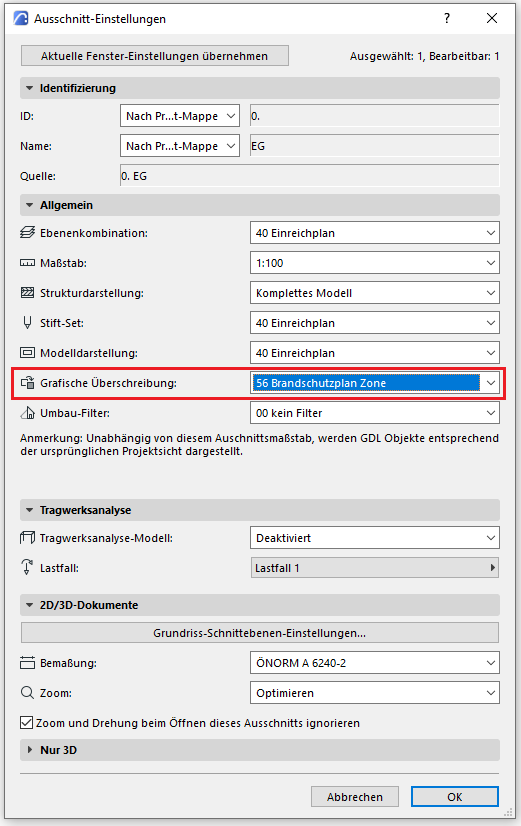
Here is an example of the graphical overwriting rule.
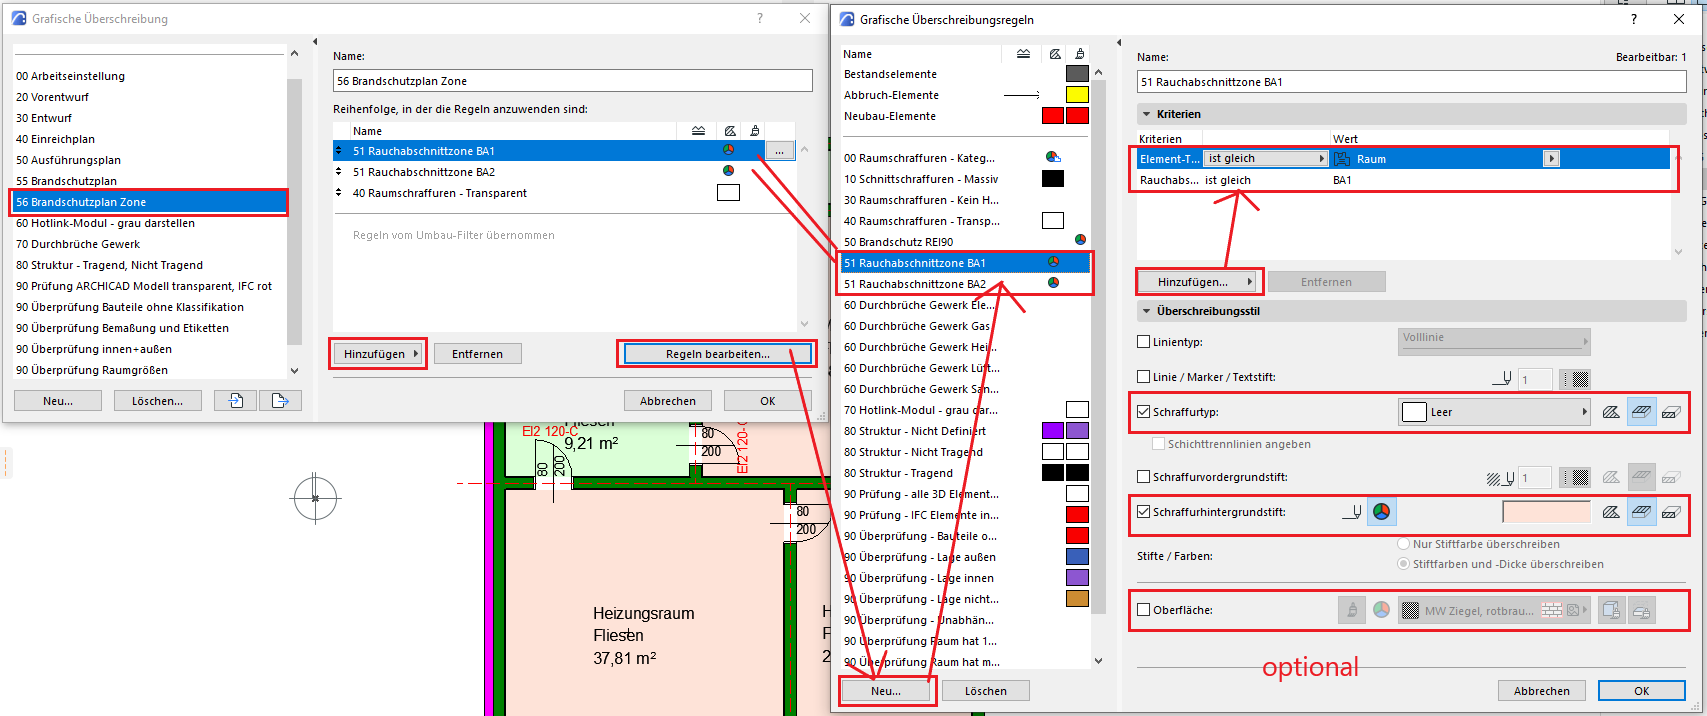
- Let's create a new graphical override.
- Editing the rules in the separate dialog box
- There, we create as many rules as necessary.
- Let’s add the properties mentioned above to the criteria.
- The overlay hatches and the background pen color should be overridden. Select an RGB color. The surface is not necessarily relevant, so this remains optional.
- We add the newly created rules to the override and place them before the rule “40 Room Hatches – Transparent” to ensure the priority of the rules.
Note:
Changes affect not only the selected section, but also all sections to which the modified graphic overlay has been assigned.
Individual reports for the fire compartments are generated as zone labels, and these tables must be placed on the plan:
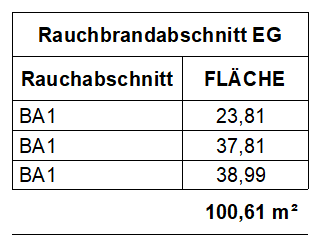
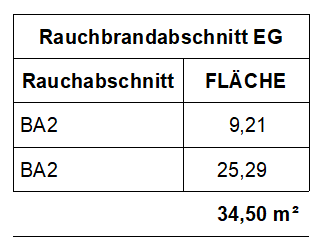
Example of use:
This is what a pre-designed color scheme for fire and smoke compartments might look like.


Unfortunately, this content is available only to our Pro users.
If you'd like to read the full article, try the Pro account or become a Pro user.