Creating views manually for all rooms in the model is time-consuming and resource-intensive.
In addition, it involves many individual steps that are prone to errors—for example:
- Properly naming views
- Assigning view templates
- Adhering to scales
- Neat placement on the plans
Room Views fully automates this process and ensures consistent, high-quality results.
- Automatic generation of all required room views
- Significant time savings compared to manual creation
- Improved quality through standardized settings
- Reduction in manual steps
- Error prevention through automated naming and placement
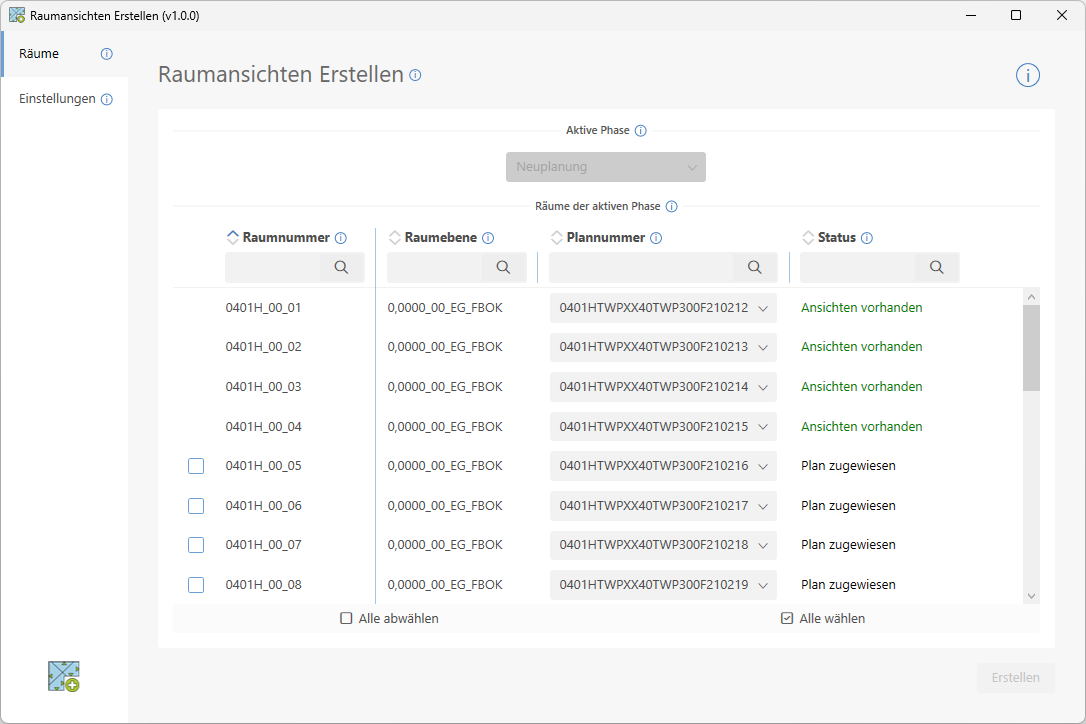
Rooms
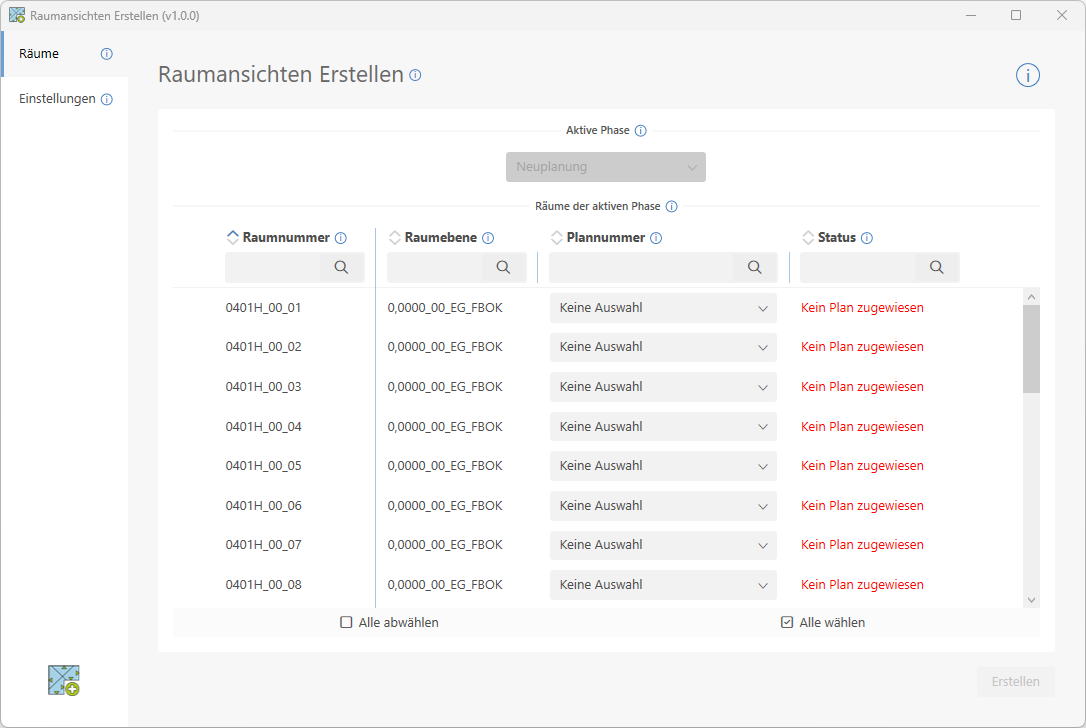
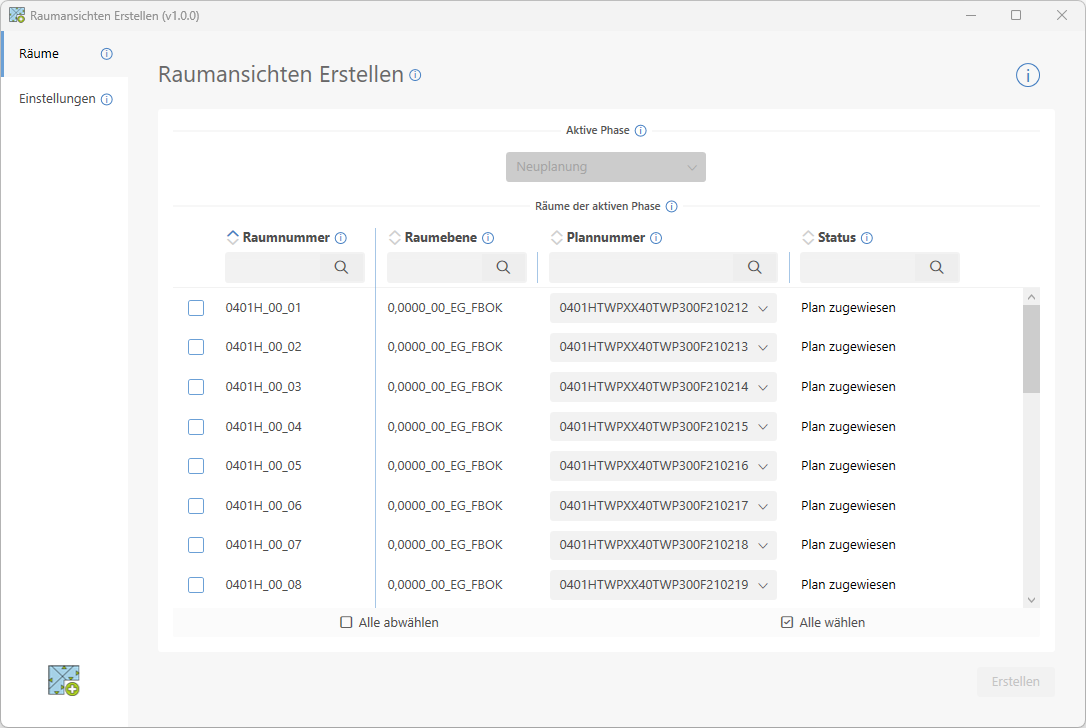
The Rooms page provides an overview of all rooms in the active model that correspond to the selected phase. If rooms are present in only one phase, that phase is already selected automatically.
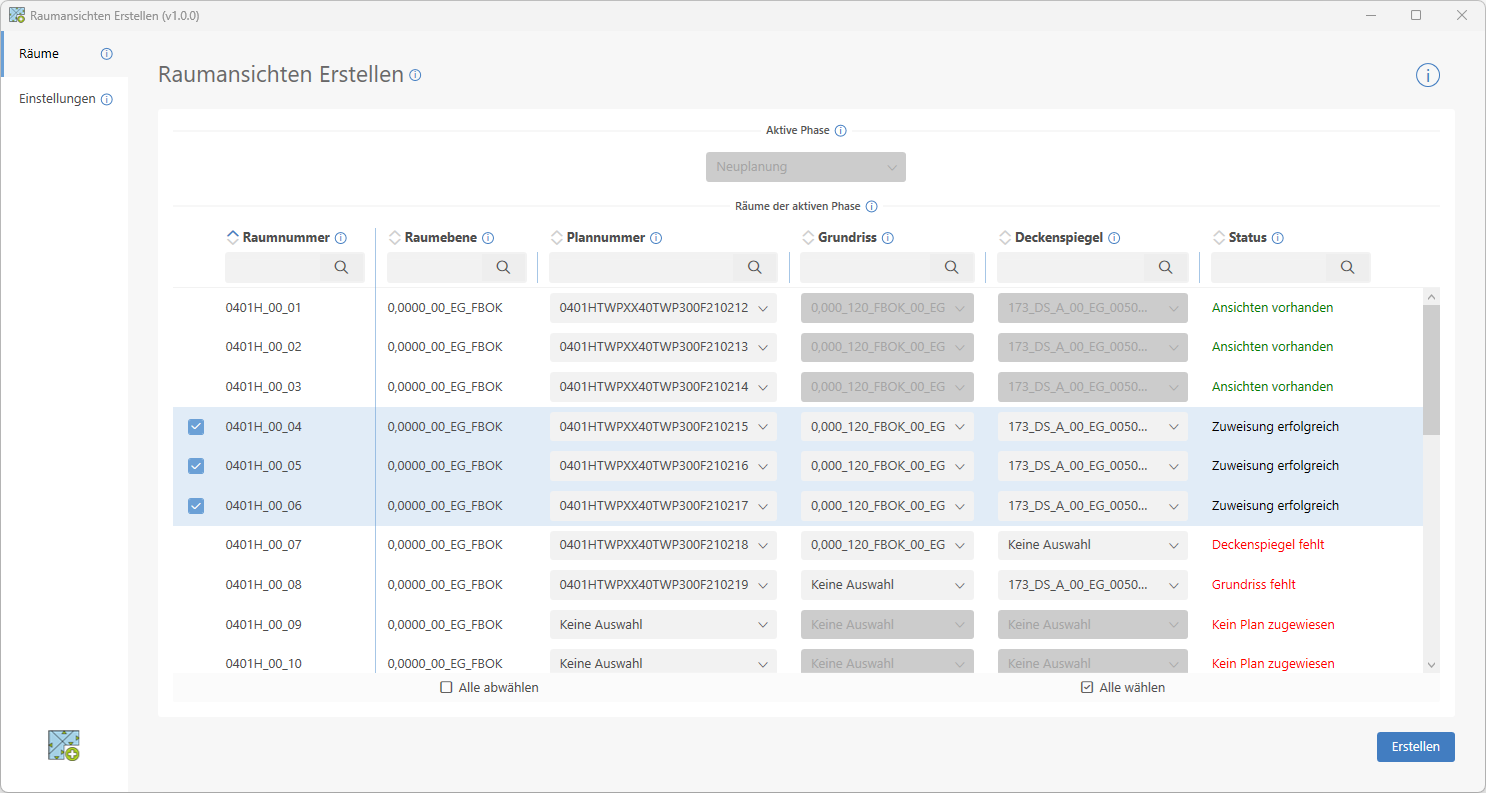
You can assign plans and main views using the drop-down lists. Alternatively, you can assign them via a parts list or plan list.
The status informs you that:
- whether a floor plan has already been assigned to the room.
- whether main views have already been assigned to the room (for creating dependent top views).
- whether this plan already contains views.
To create views, the room must meet the following requirements:
- A plan must be assigned to the room.
- The assigned plan must not contain any views.
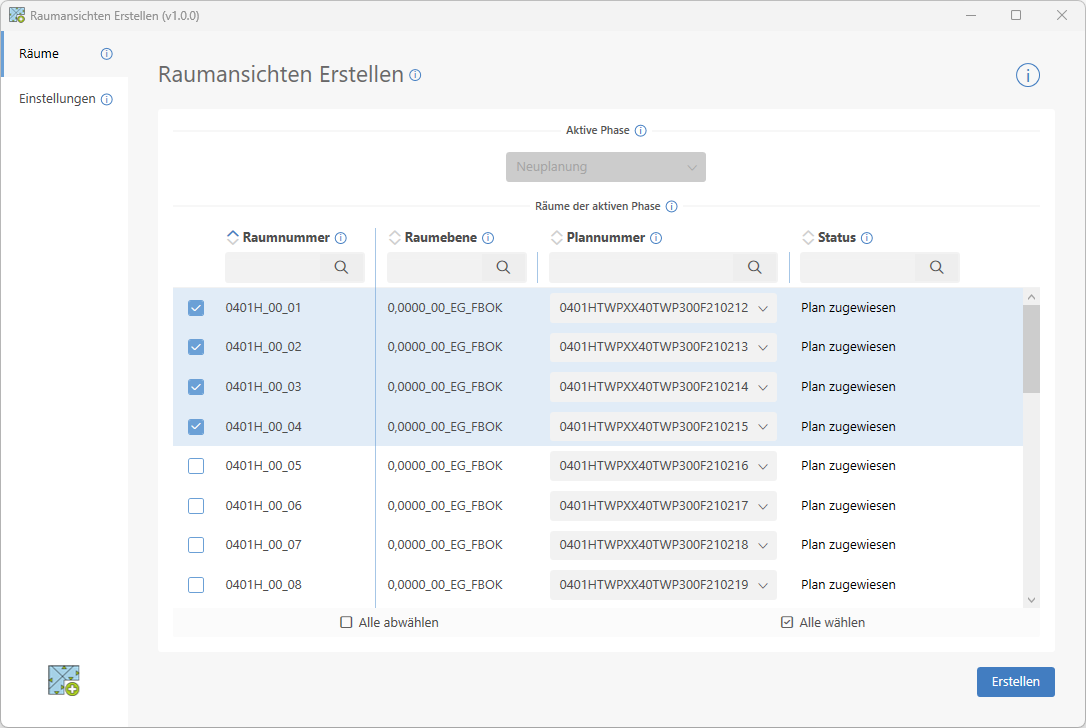
If these conditions are met, the status "Assignment successful" will be displayed; the room can now be selected and views can be created.
In "Generate views based on" mode, there is an additional requirement that must be met:
- The room must be assigned a main floor plan view and a main ceiling plan view. These are the foreman's plan views from which the dependent views for the room are generated.
Rooms with a status other than "Assignment successful" cannot be selected.
Settings
On the Settings page, you can customize the creation of room views to suit your preferences.
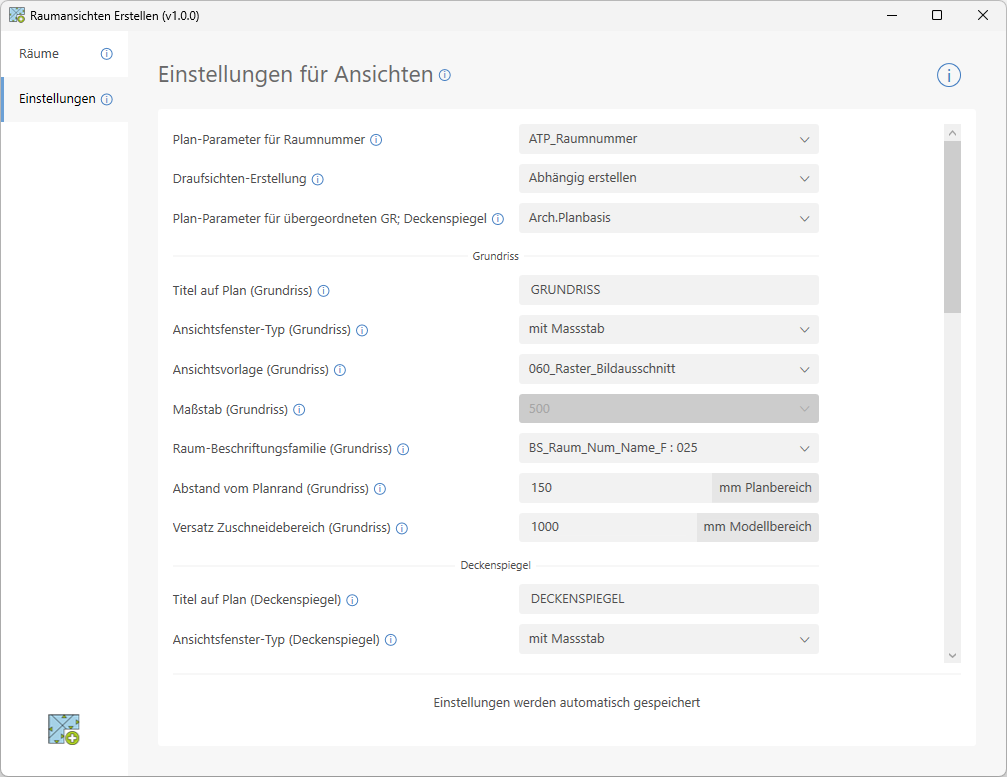
- Parameter definition for assignment
- View properties for each view type
—view window type—
view template—
scale—
label family—offsets
Let's take a closer look at the parameter definition:
- Plan parameter for room number
The plan parameter in which the room number is entered. - Top View Creation
Create top views for rooms as new views or as dependent views. - Plan Parameter for Parent GR; Ceiling Plan
This parameter must only be defined in "Create Dependent Top Views" mode. In this mode, the view names of the main views must be entered in the selected plan parameter. Only then will the corresponding room have the status "Assignment Successful".
Wall views
Wall views can be created either as views or as sections.
The design is based on the room's outline.
- A view is created for each room edge
- Room edges with a length < 0.5 m are ignored
- By default, the sections are placed inside the room at a distance of 1 m from the room edge. However, this distance can be freely configured.
The following floor plan illustrates the placement of section lines and the view.
Prepare plans
- Make sure that a floor plan is available in the model for all the rooms you want.
- Assign a floor plan to the rooms.
If the desired parameter is not yet available:
- Add the "Plans" category to the project parameter.
Preparing plans at ATP
- Create the plans using the plan tool.
- Select the parameter ATP_RoomNumber as the plan parameter for the assignment.
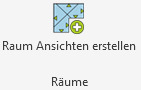
Create Views
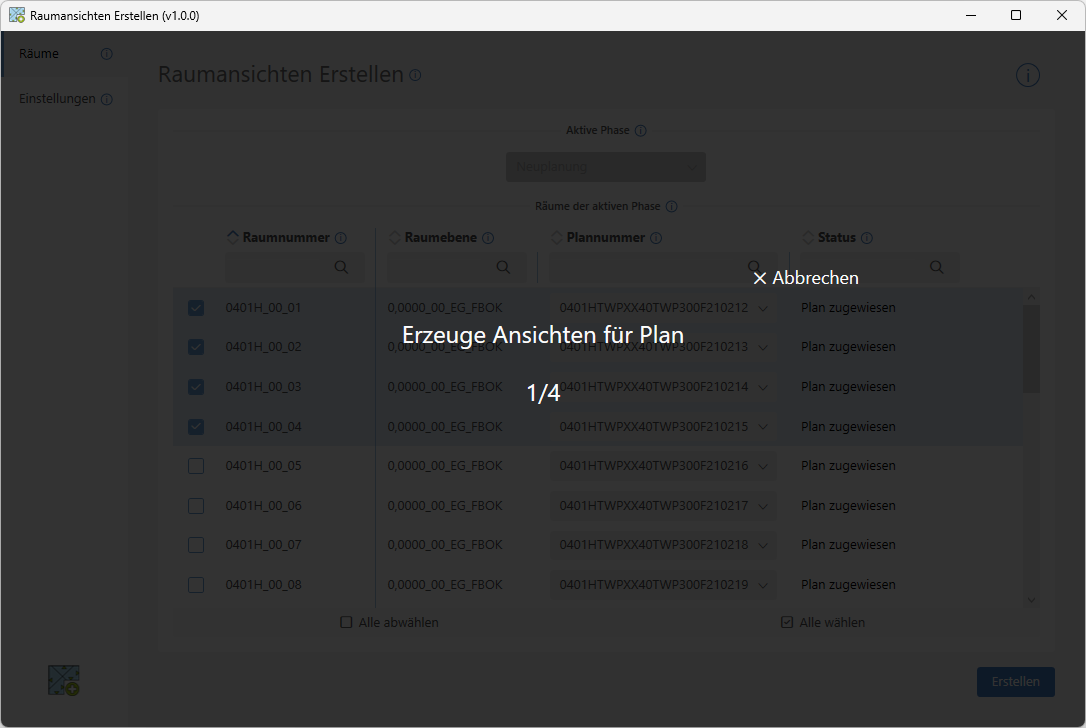
Click the button to start "Create Room Views."
The views are now being generated; the user interface will keep you updated on the progress.
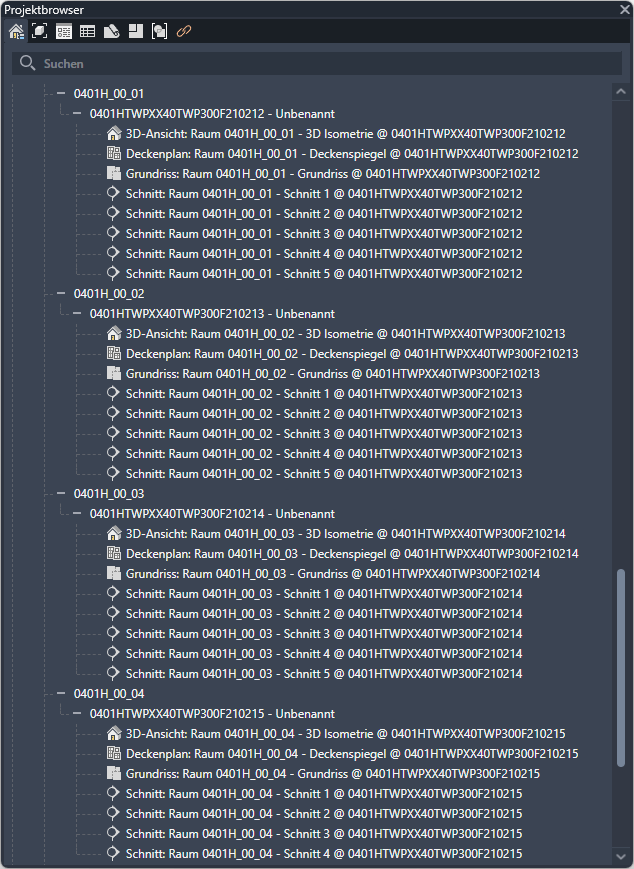
Result
The following are automatically created and placed in each room:
- 1 Floor Plan
- 1 ceiling plan
- 1 elevation/section per room edge
- 1 3D isometric view (optional)

- 1.0.0.0
Initial release for Revit 2022–2026
If you have any problems or questions, or if you have ideas or suggestions, please feel free to contact our customer service team. We look forward to hearing your suggestions for improvement!

Unfortunately, this content is available only to our Pro users.
If you'd like to read the full article, try the Pro account or become a Pro user.