"Resolve Pipe Collisions" automatically resolves intersections between selected pipes, saving you the trouble of modeling them manually. The add-in thus helps you solve a common daily problem: resolving pipe collisions.
To load this content, you need to allow the YouTube service.
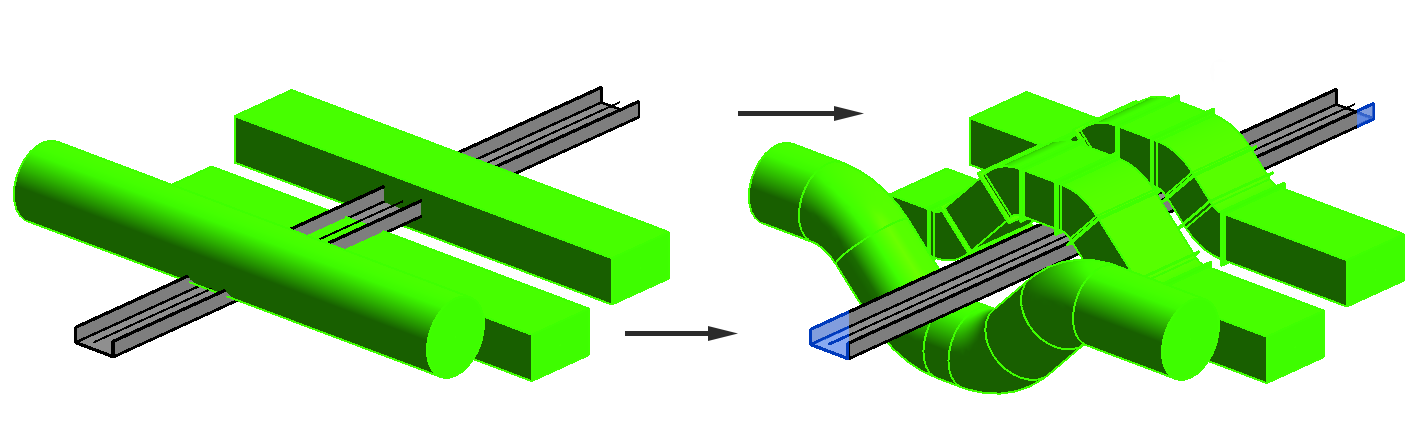
In MEP design, numerous pipes and cables often converge in tight installation spaces and must be routed without collisions. When modeling manually in Revit, this is very time-consuming; at least three elements (e.g., curved fittings) must be modeled and geometrically configured at each intersection point to route around a line.
- Significantly faster modeling of intersections
- Work in 3D, in section, and in plan view
- Freely configurable intersections: distances up, down, left, and right; angles for transitions, etc.
- Creation of bypasses, including for structural elements
- Linear workflow, easy to use
Find collisions
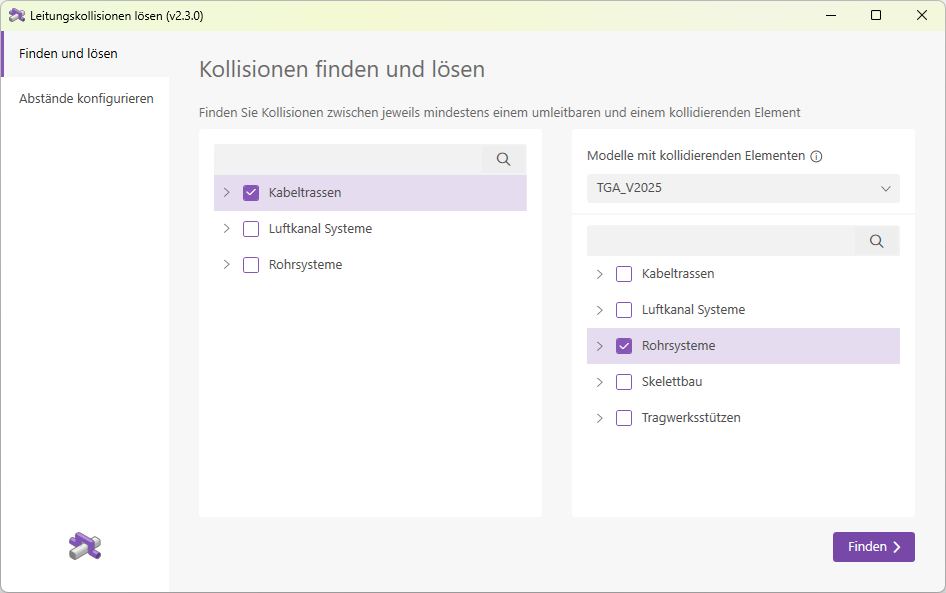
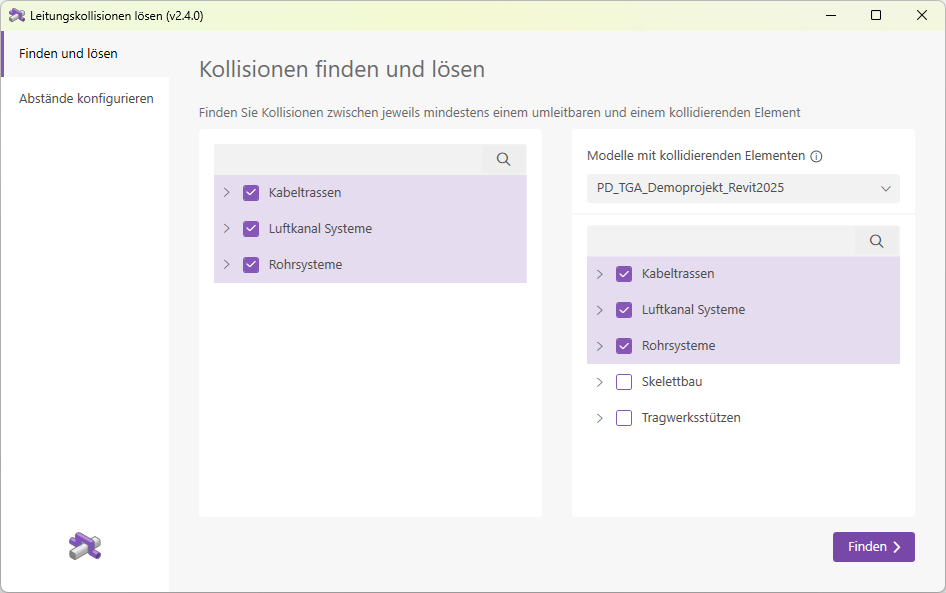
On the "Find and Solve" page, you can specify which elements should be included in the collision check.
- Left column:
Select the pipe types here that you want to check for collisions. Use the search field if you want to find a specific type. - Right column:
Specify which elements should be used to check the selection from the left column for collisions. By default, elements from the active model are displayed here. However, you can also use the dropdown list to select a linked model; the corresponding elements will then be displayed. In addition to line types, this column also offers types from the Skeleton Construction and Support Braces categories. A search field is also available in this column.
The line types are grouped by category. You can select individual types or all types within a category at once. In the example above, all types in the "Cable Trays" category are checked for collisions with all types in the "Pipe Systems" category.
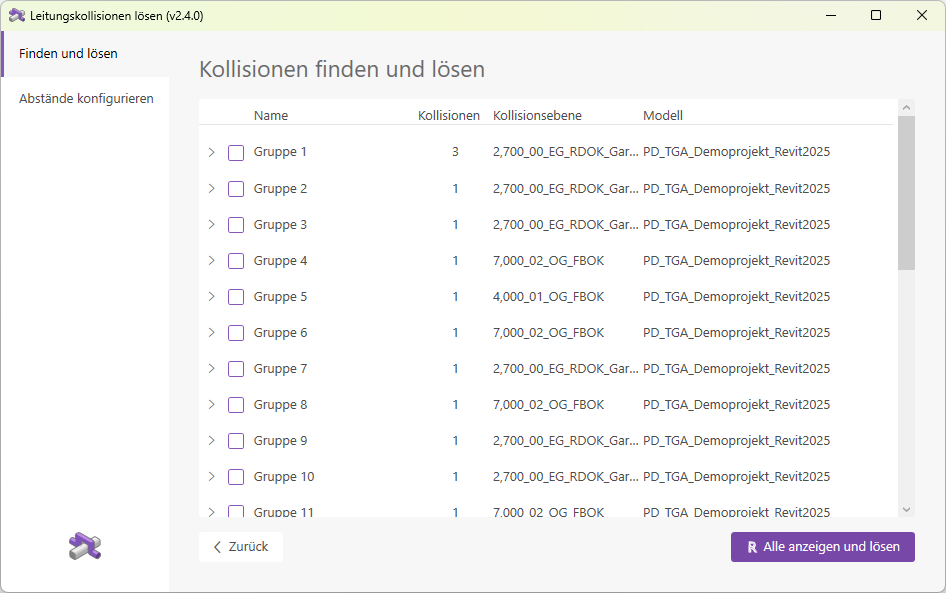
Collisions found:
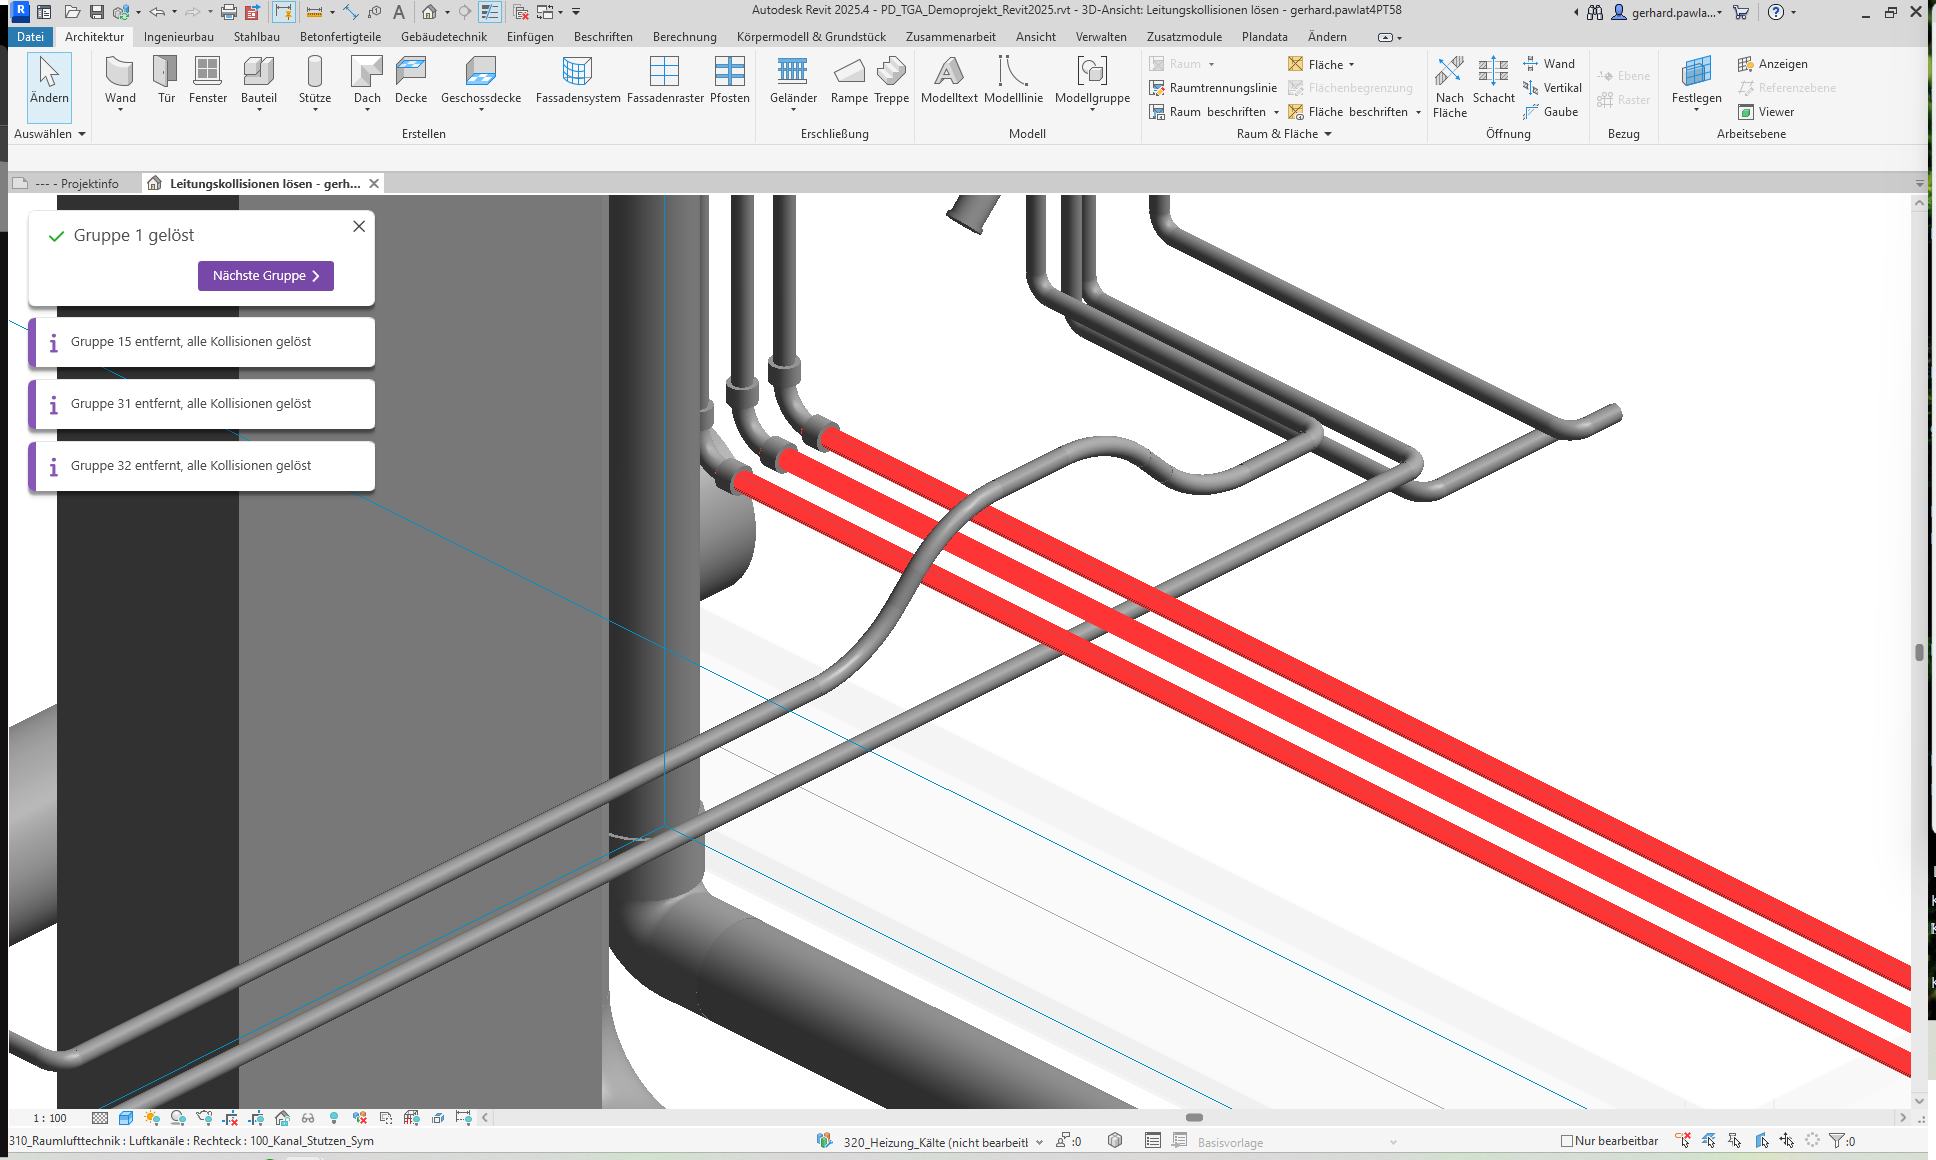
The detected collisions are then displayed as groups in a list.
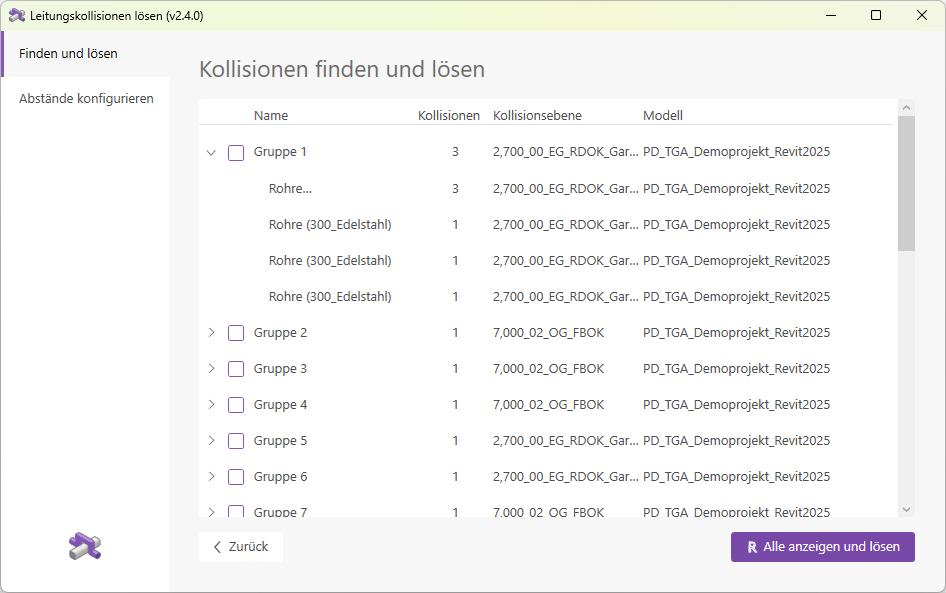
A group always consists of pipe elements that collide with one another. In the example given, Group 1 contains four pipes. The first pipe collides with the other three pipes, and each of these, in turn, has a collision.
Show collisions
The following important functions are available to help you resolve conflicts:
- An interaction window that allows you to easily navigate through the groups
- Optimized 3D and 2D views for checking and selecting lines
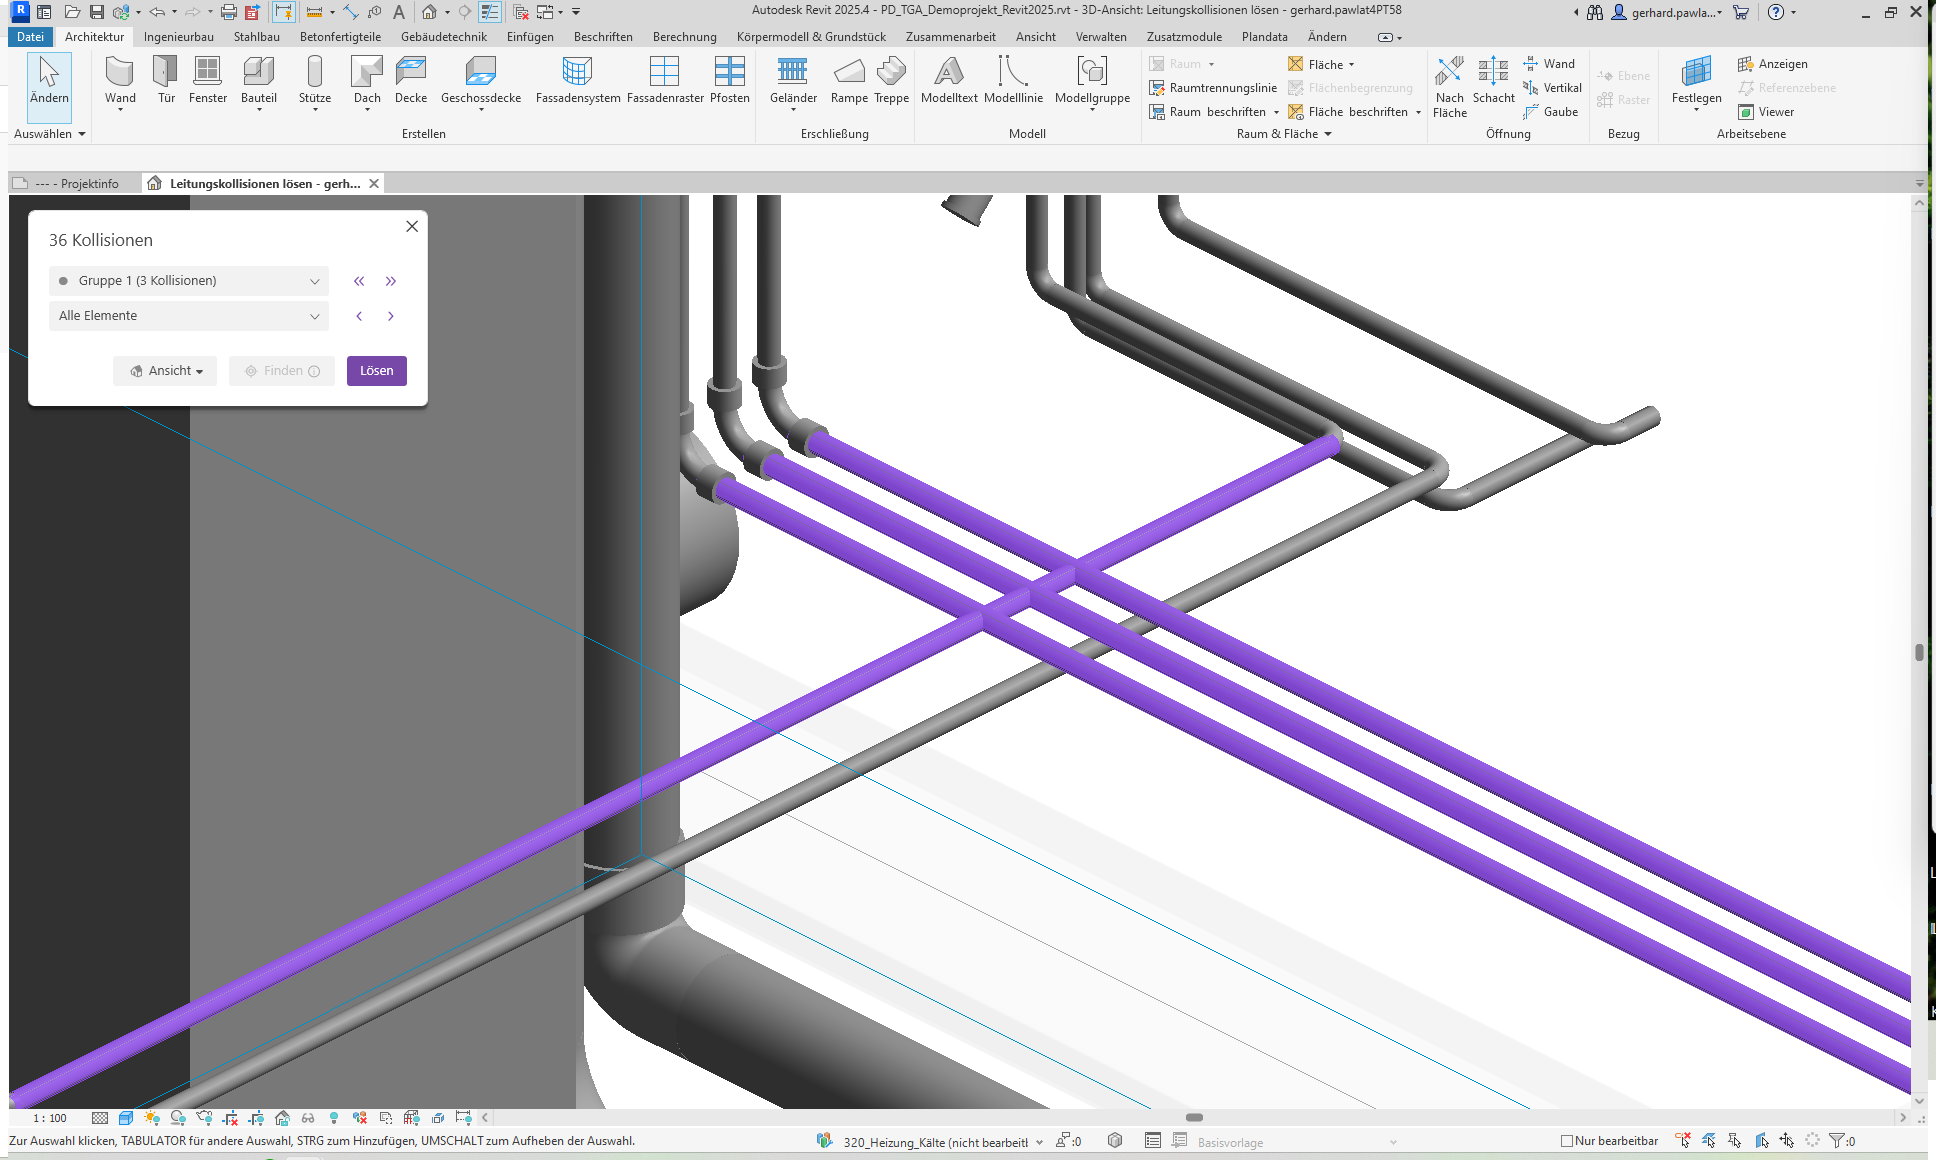
The Navigation Window
Use this window to navigate through the different groups and solve them.
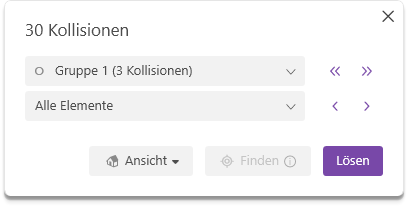
Let's now take a closer look at the individual controls and functions.
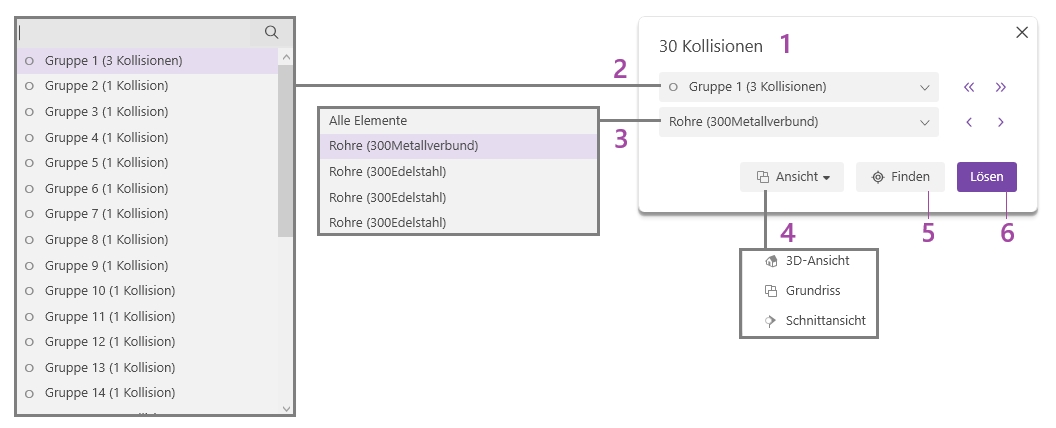
- The title shows the number of collisions found and, therefore, the number of groups.
- All groups are displayed in the group drop-down list; use the list to select a group. You can use the navigation arrows to the right of the drop-down list to cycle through the groups one by one. The icon in front of the group name indicates whether a group is being viewed for the first time (filled circle), whether a group has already been viewed (empty circle), or whether a group has already been partially resolved (pencil). If all collisions in a group are resolved, the group disappears from the list.
- The element drop-down list displays all elements of the selected group. If you select an element in the list, it is highlighted in color in the view. Use the navigation arrows to the right of the drop-down list to scroll through the elements one by one.
Note: Selecting an element is not required in this window. However, you have the option to select the element to be redirected here, which saves you from having to select it in the next step.
Resolve collisions
There are three steps to solving a group:
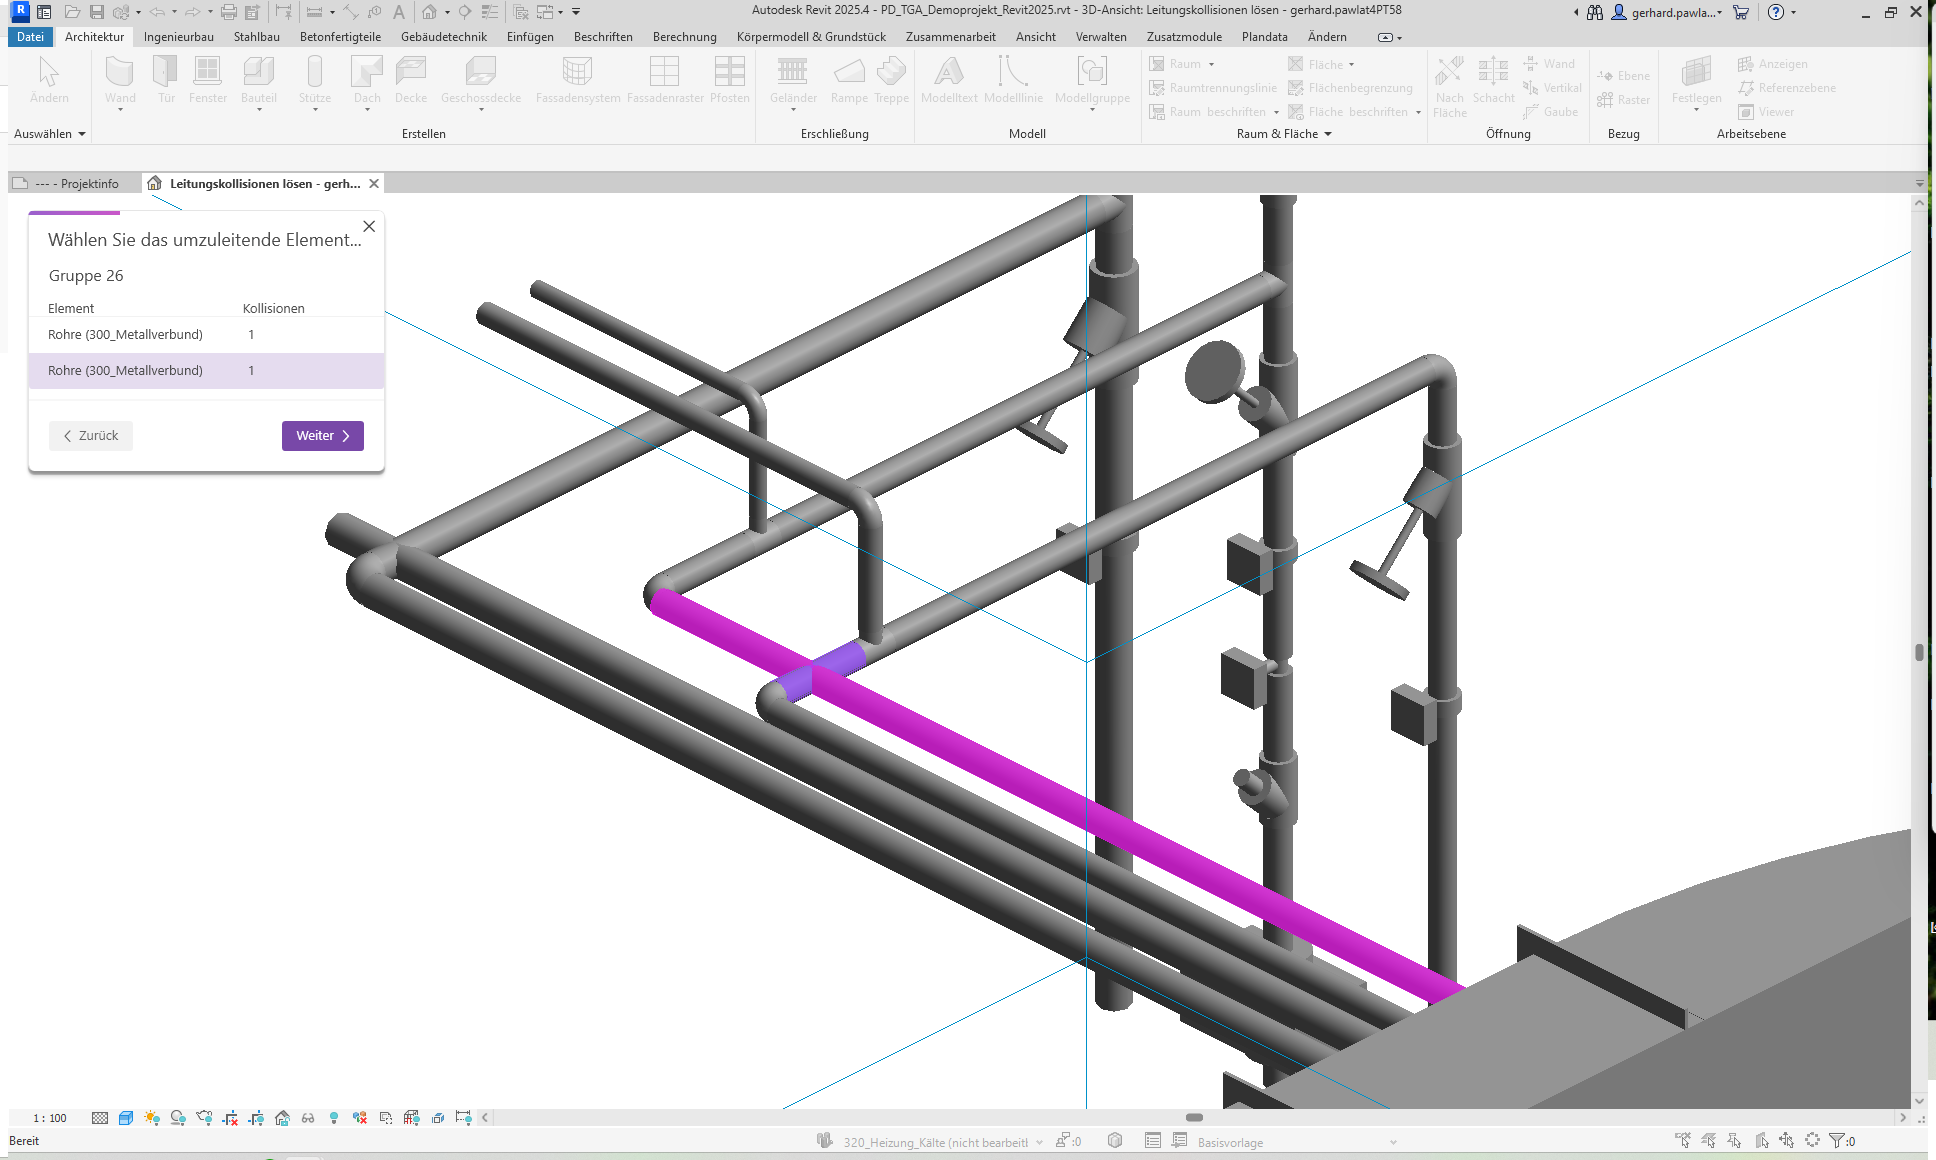
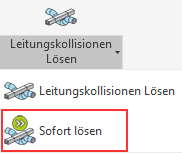
- Select the element to be redirected
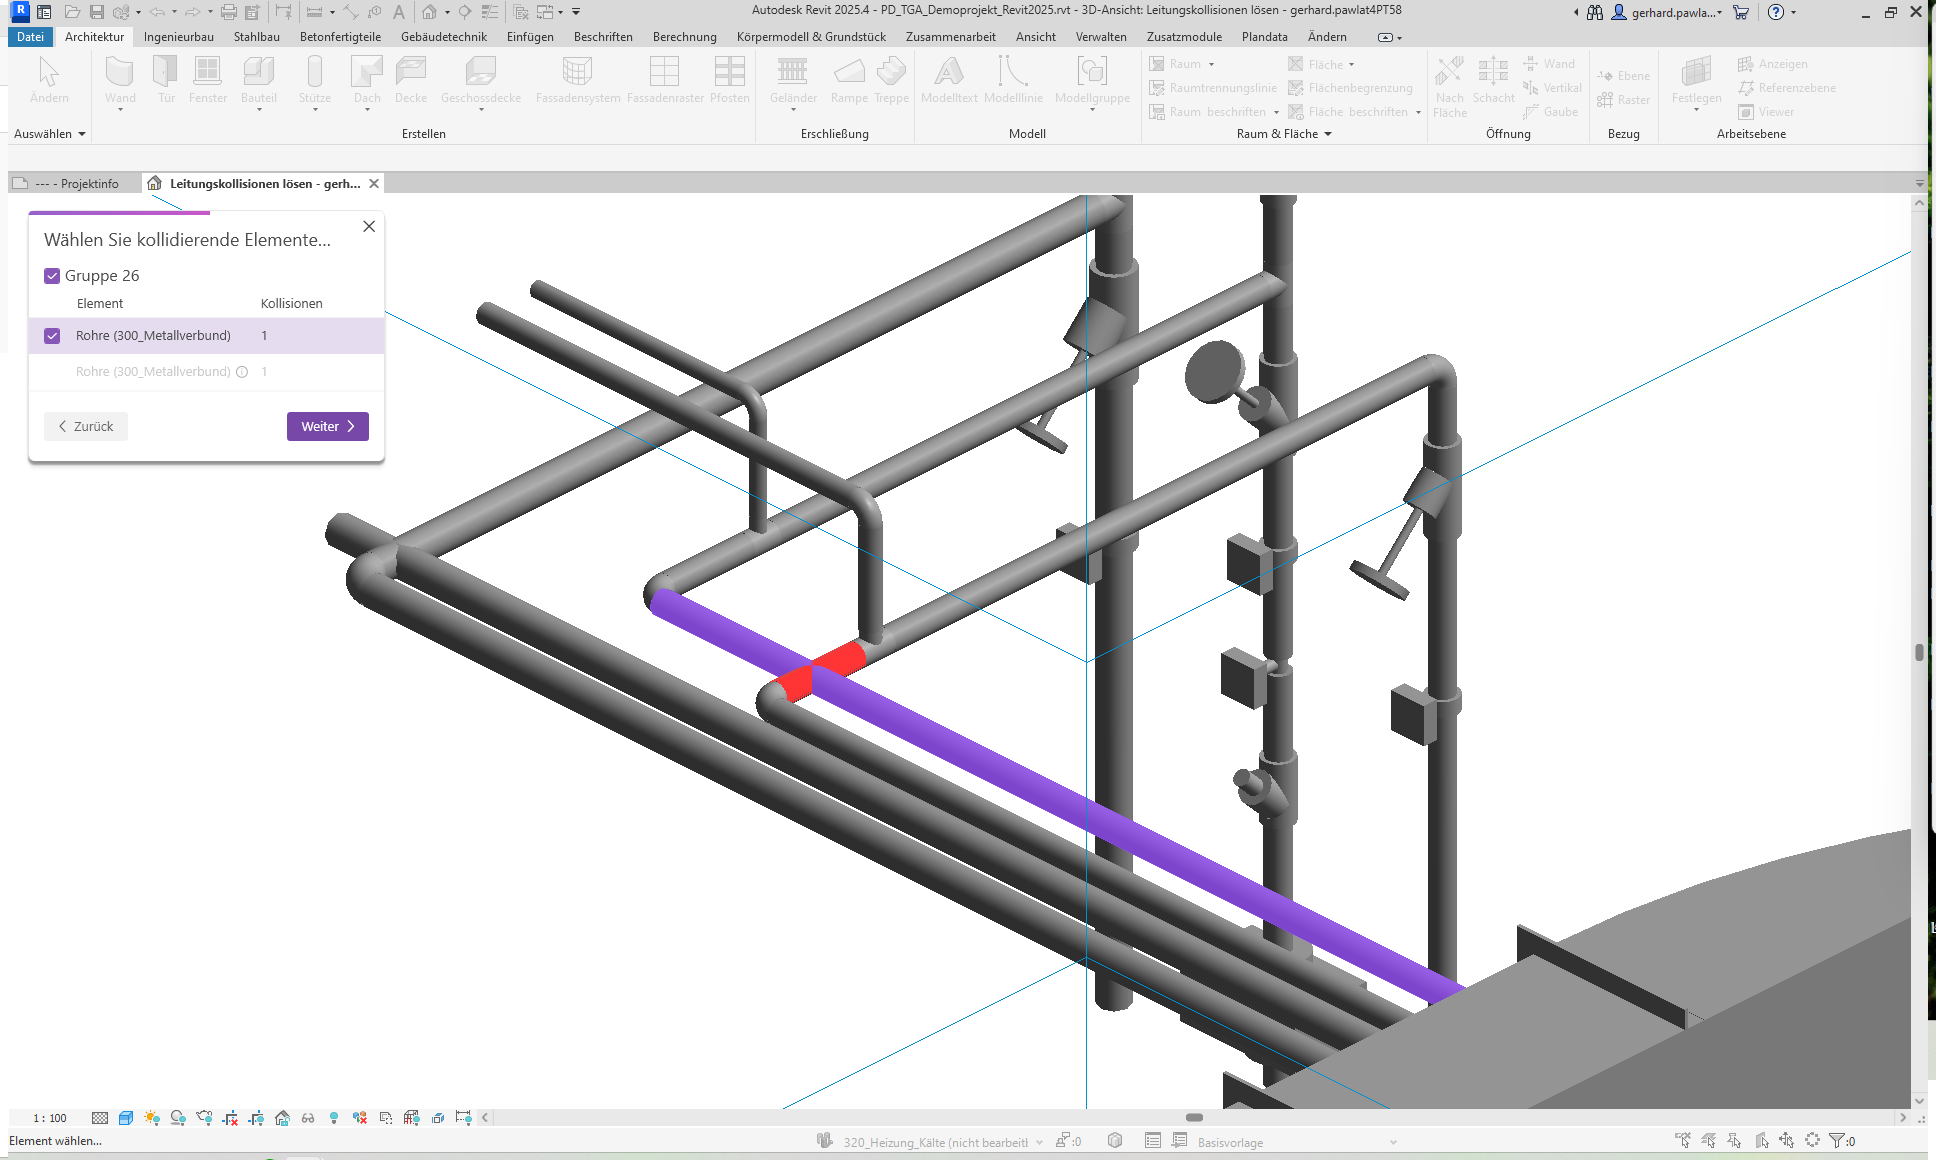
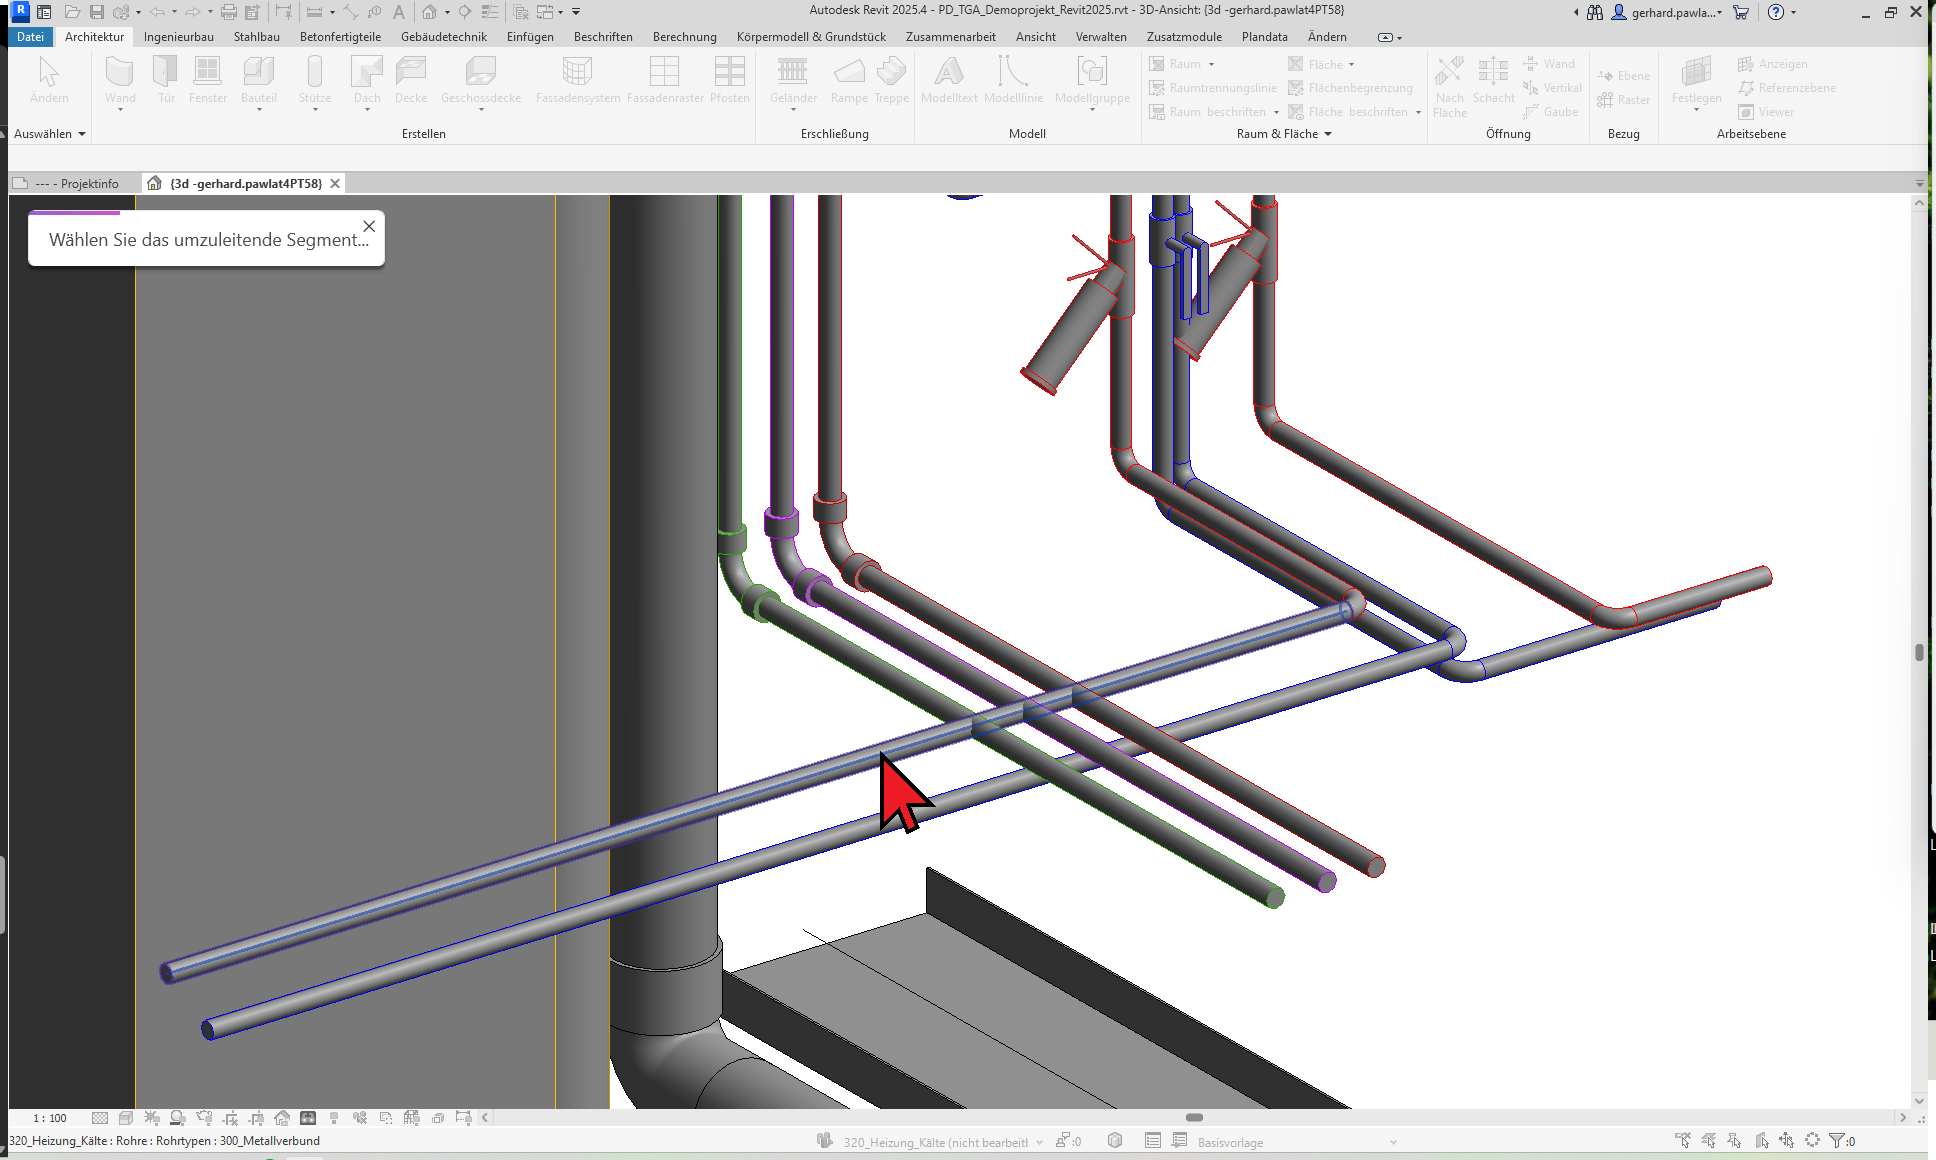
- Select conflicting elements
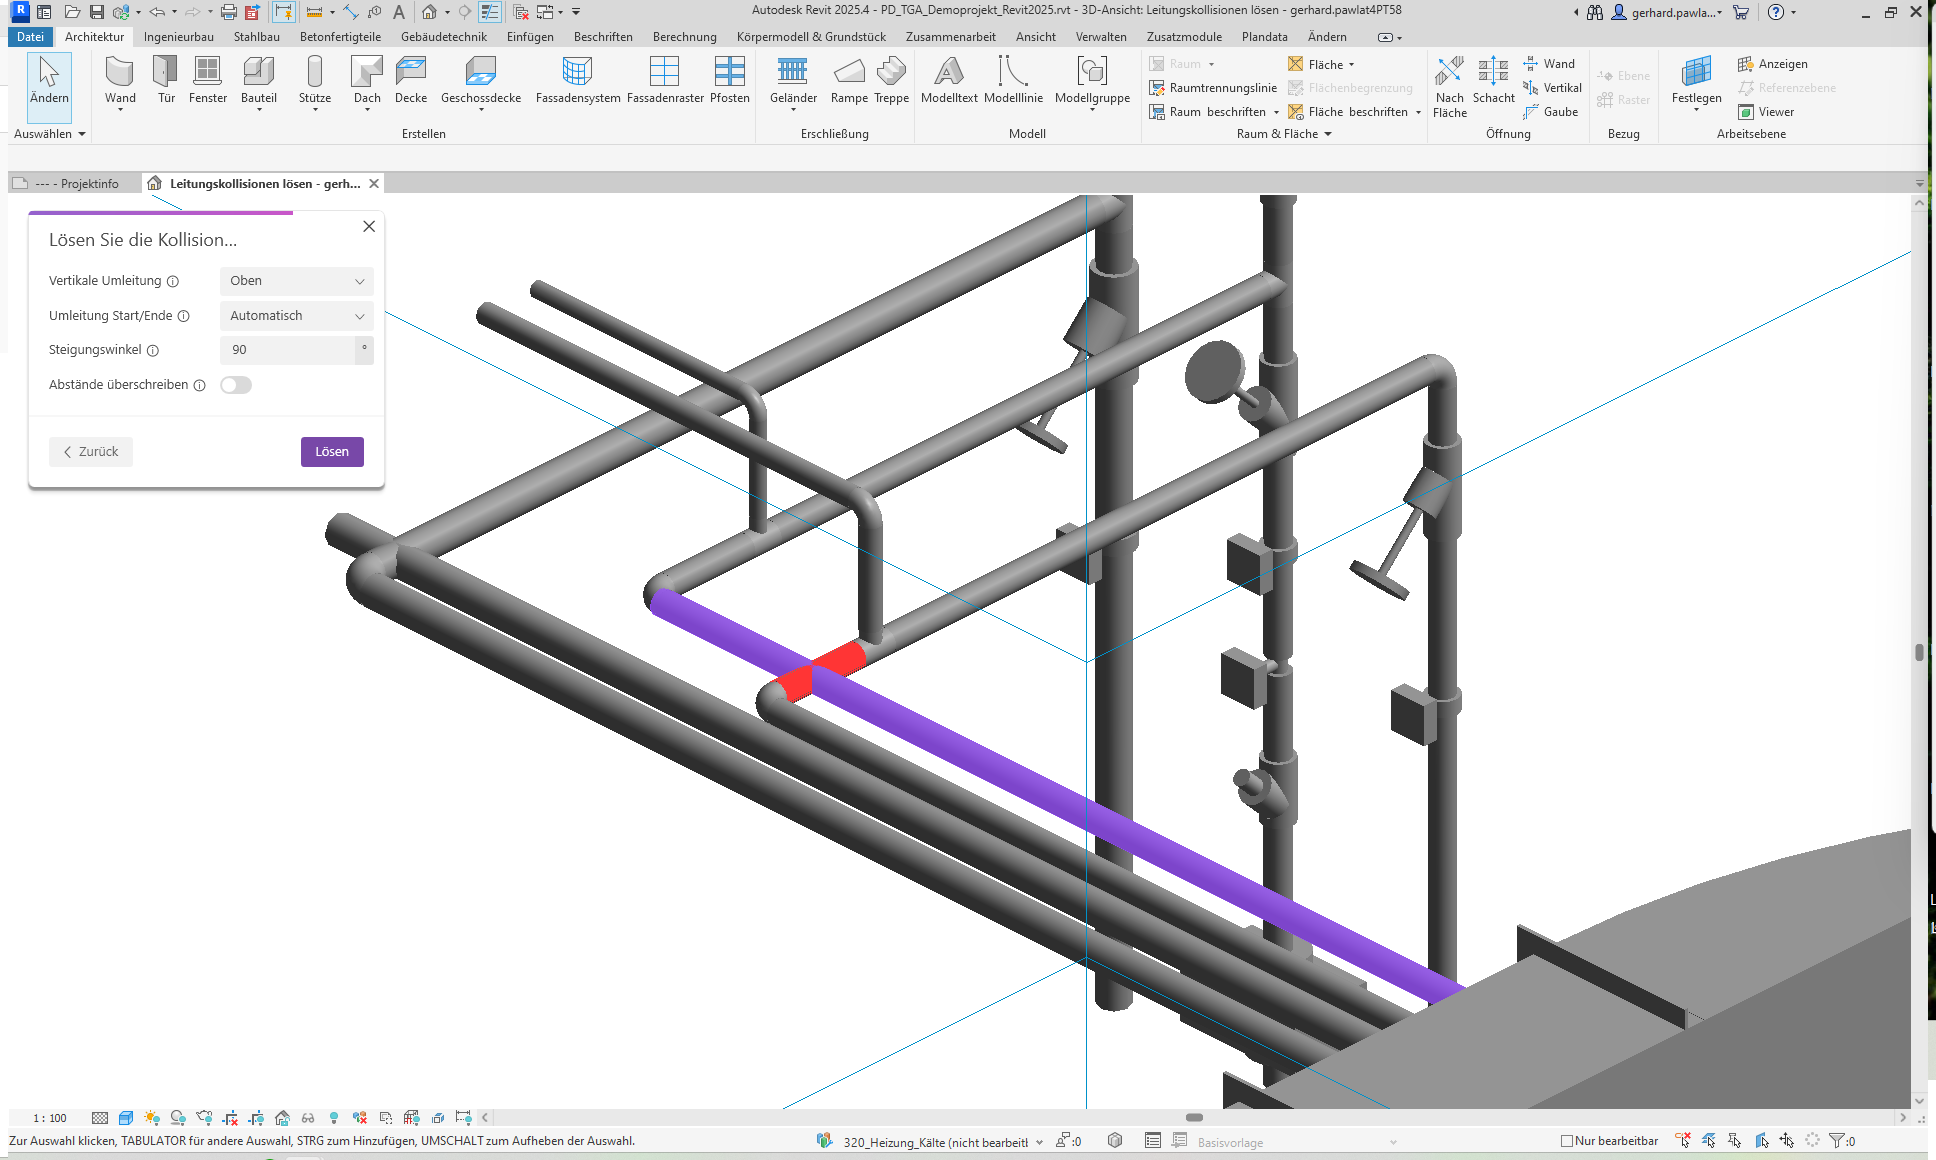
- Define rerouting settings
The user interface guides you through the process in a new window.
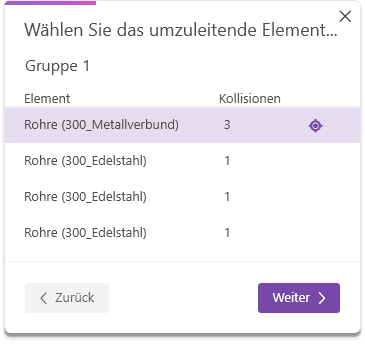
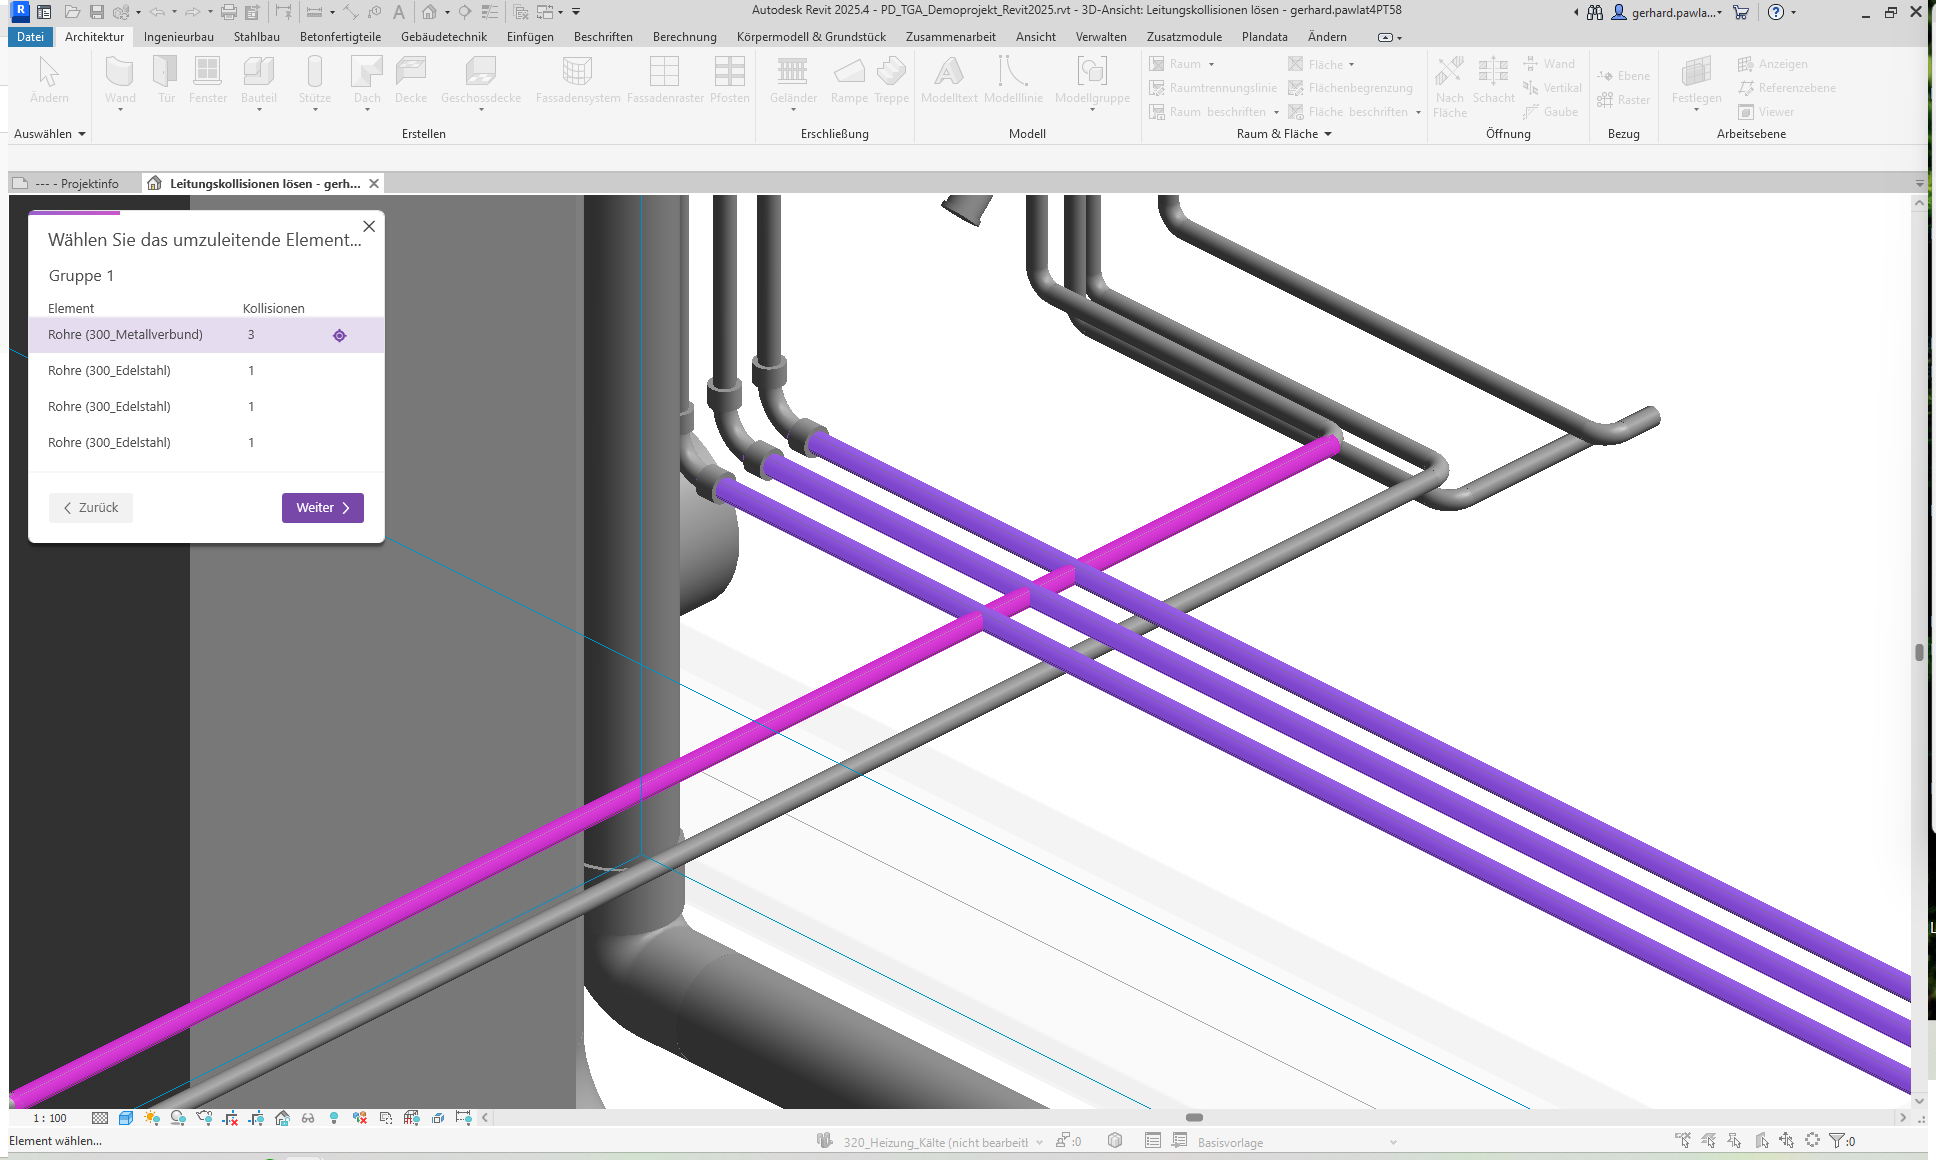
- Select
the element to be redirected This page lists all elements in the active group. In addition to the element type, the number of collisions for each element is also displayed. As soon as you select an element, it is highlighted in pink in the view. The "Find" icon (crosshairs) also allows you to zoom in on the element's boundaries and highlight it by making it flash.
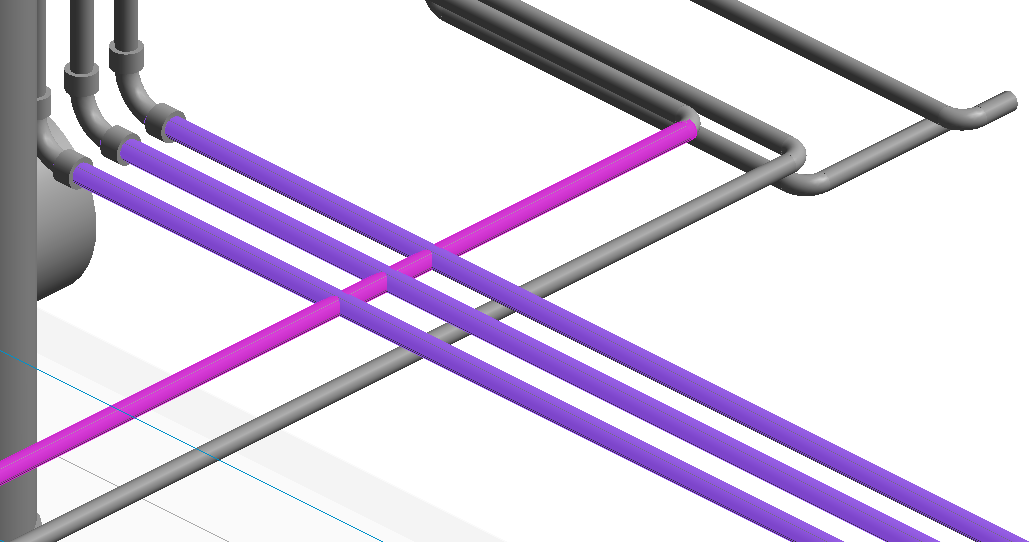
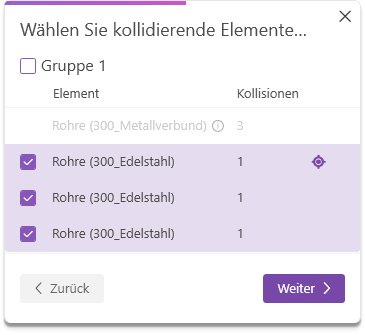
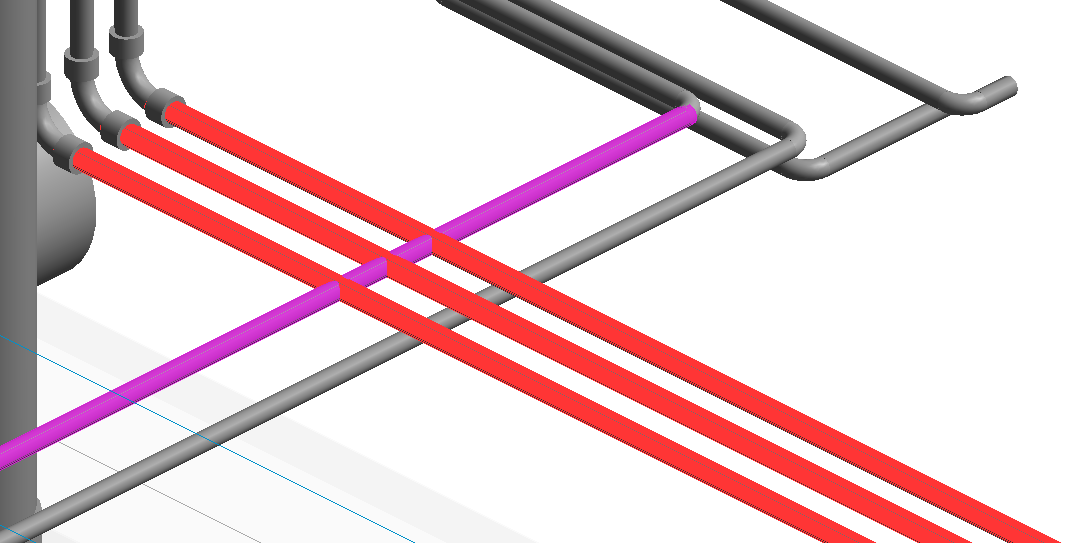
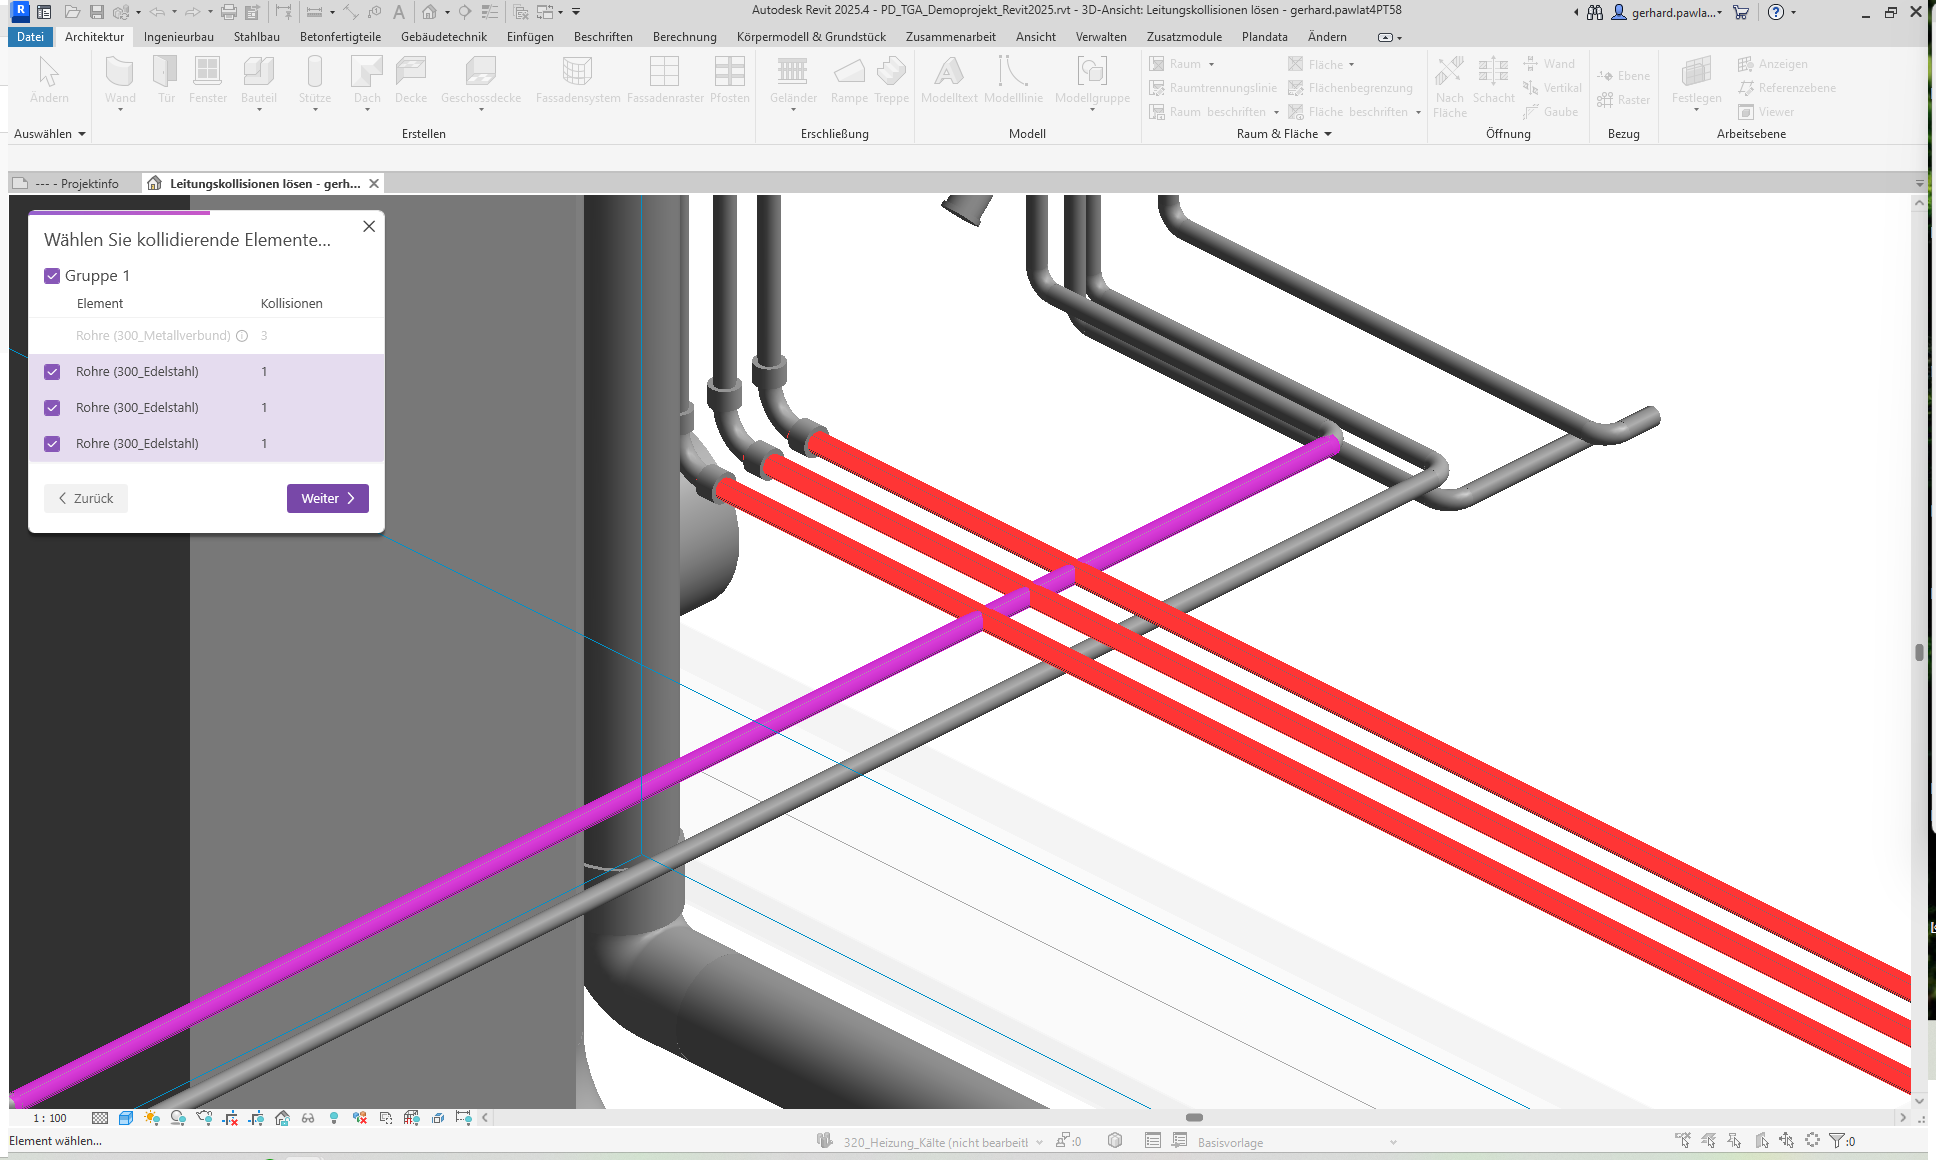
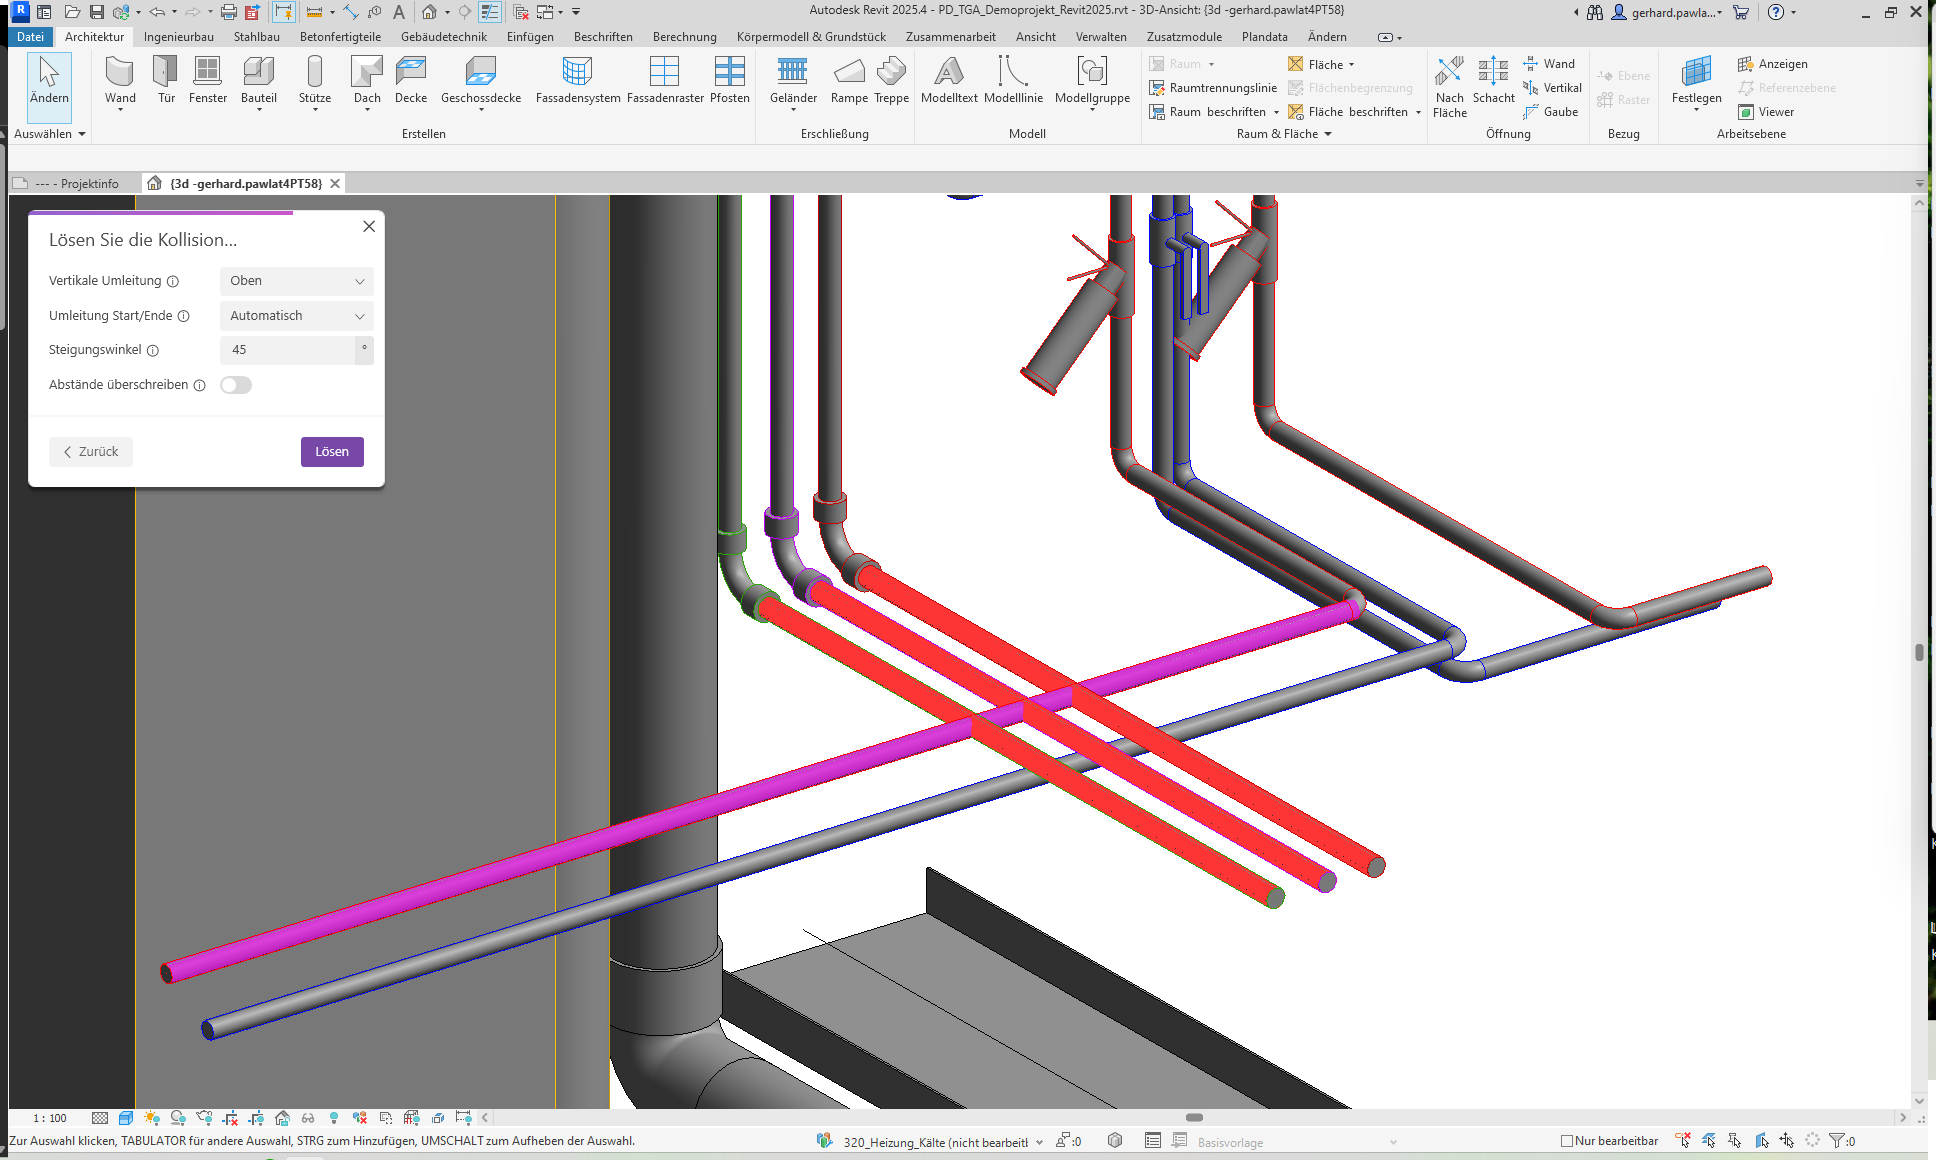
Colliding Elements The element to be rerouted is displayed in gray on this page; the other elements in the group remain available for selection. These can be selected individually or all at once using the group checkbox. The selected colliding elements are highlighted in red in the view.
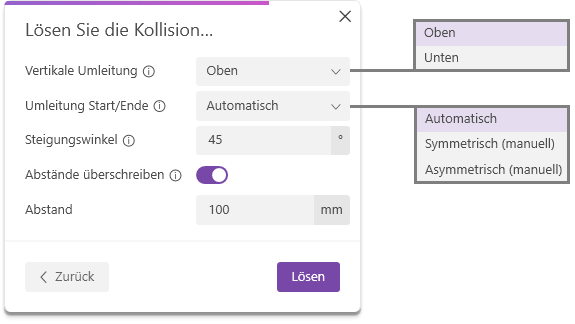
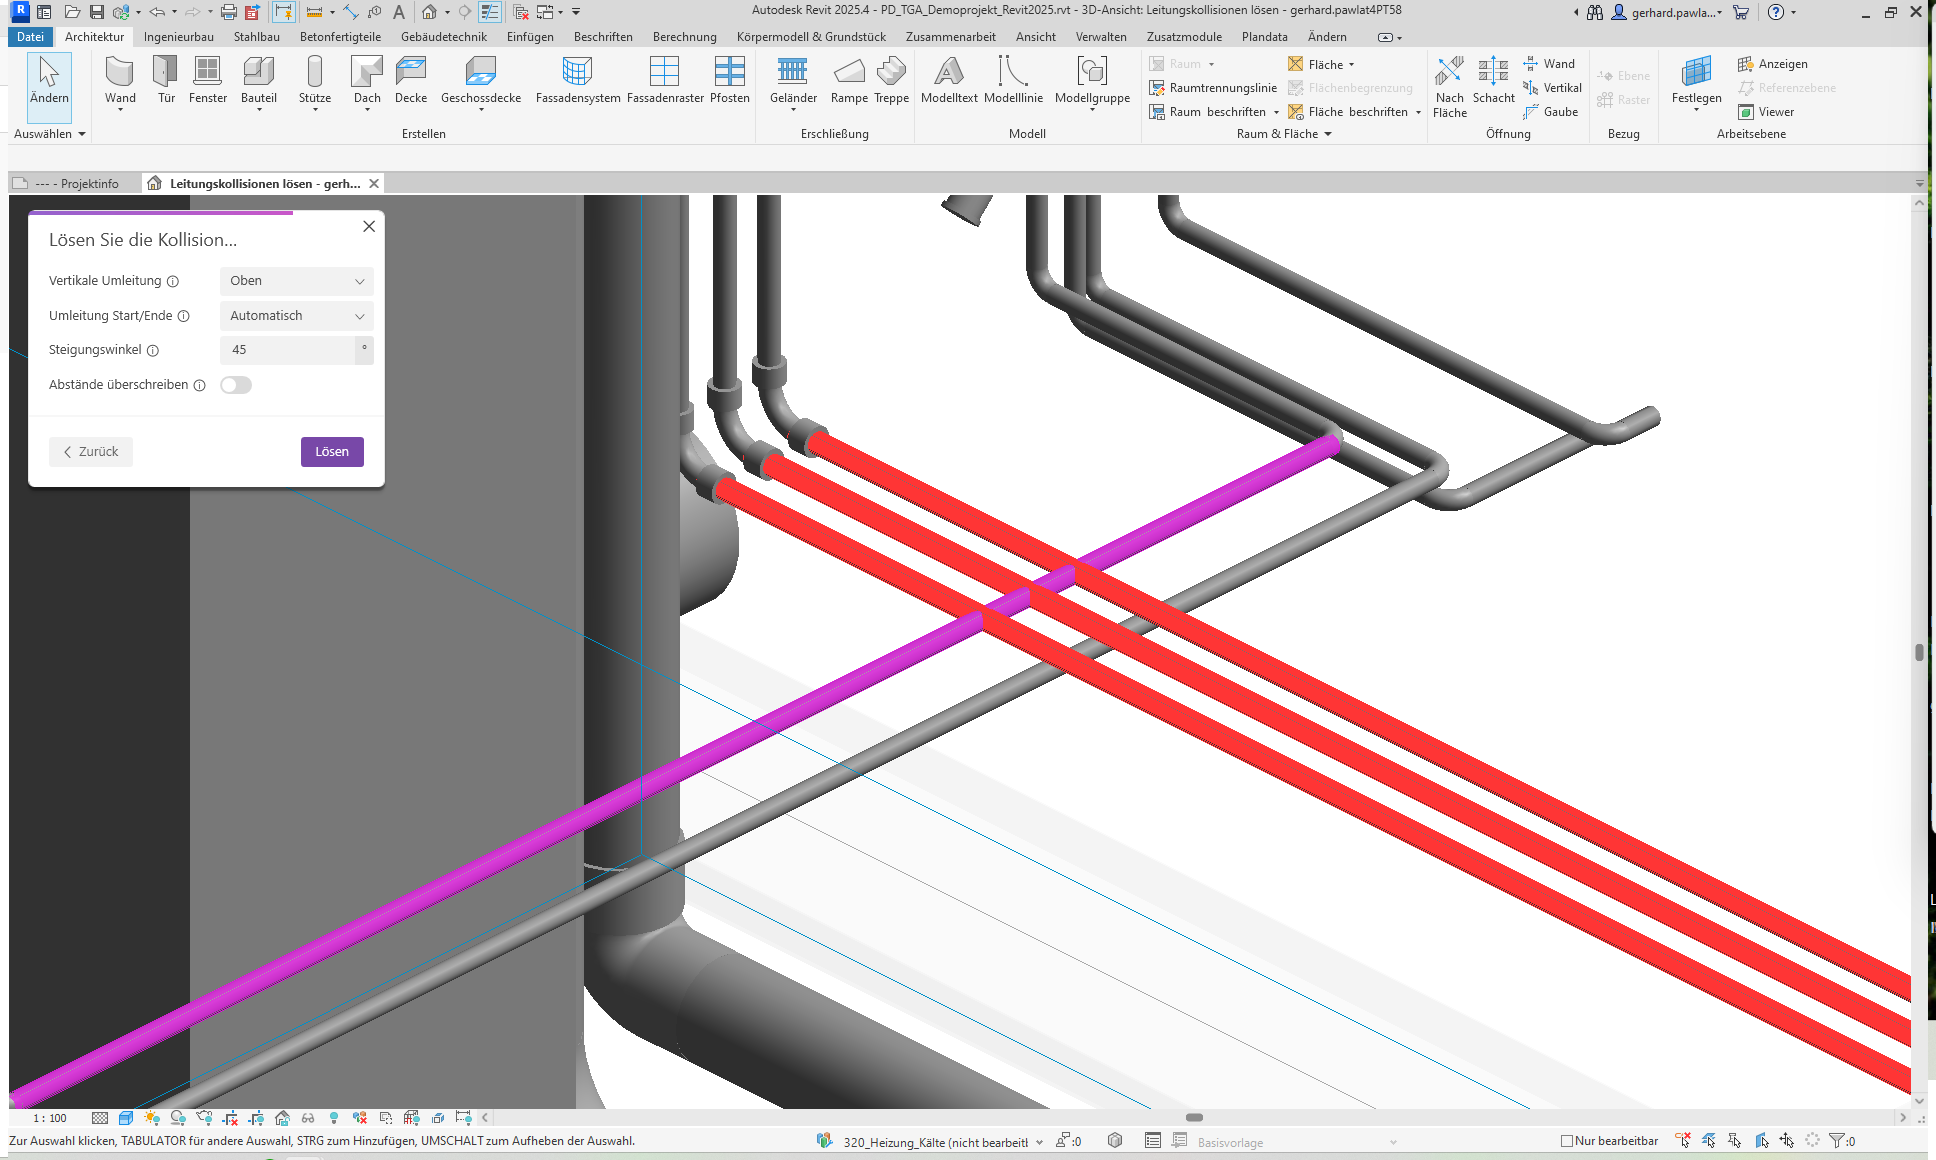
- Horizontal/Vertical Redirection: Select whether the redirection should be created to the left or right (horizontal redirection) or to the top or bottom (vertical redirection).
- Bypass Start/End: In addition to the automatic option, you also have the option to manually select the start and end points. With the "Symmetrical" option, you then define the center point of the bypass directly on the pipe element. If you want to select the start and end points freely, use the "Asymmetrical" option; you will then be prompted to select the two points directly on the pipe element.
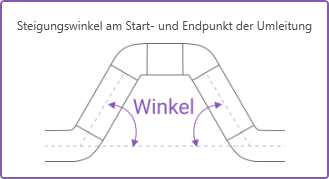
- Rise angle: Select an angle between 15° and 90°.
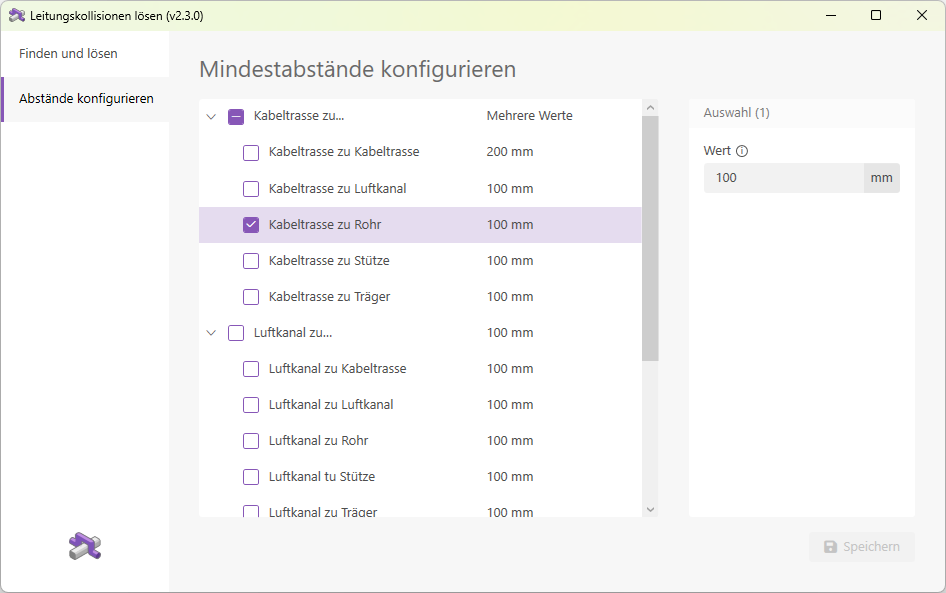
Configure Spacing
On the "Configure Spacing" page, you can manage the spacing used when rerouting pipe elements. You can adjust the spacing and save your changes. These settings are retained even after the Revit session ends.
Redeem now
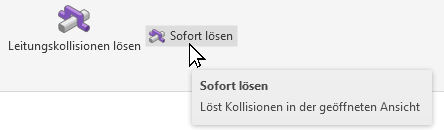
In addition to the "Resolve Line Collisions" button, this add-in offers a handy extra feature with the "Resolve Now" button.
Resolving cable conflicts
- Launch the add-in by clicking the "Resolve Pipe Collisions" button.
In the left column, we select all line types from the categories Cable Trays, Duct Systems, and Pipe Systems. In the right-hand column, we leave the active model selected and also select all line types from the categories Cable Trays, Duct Systems, and Pipe Systems.
We start the clash detection by clicking the "Find" button.
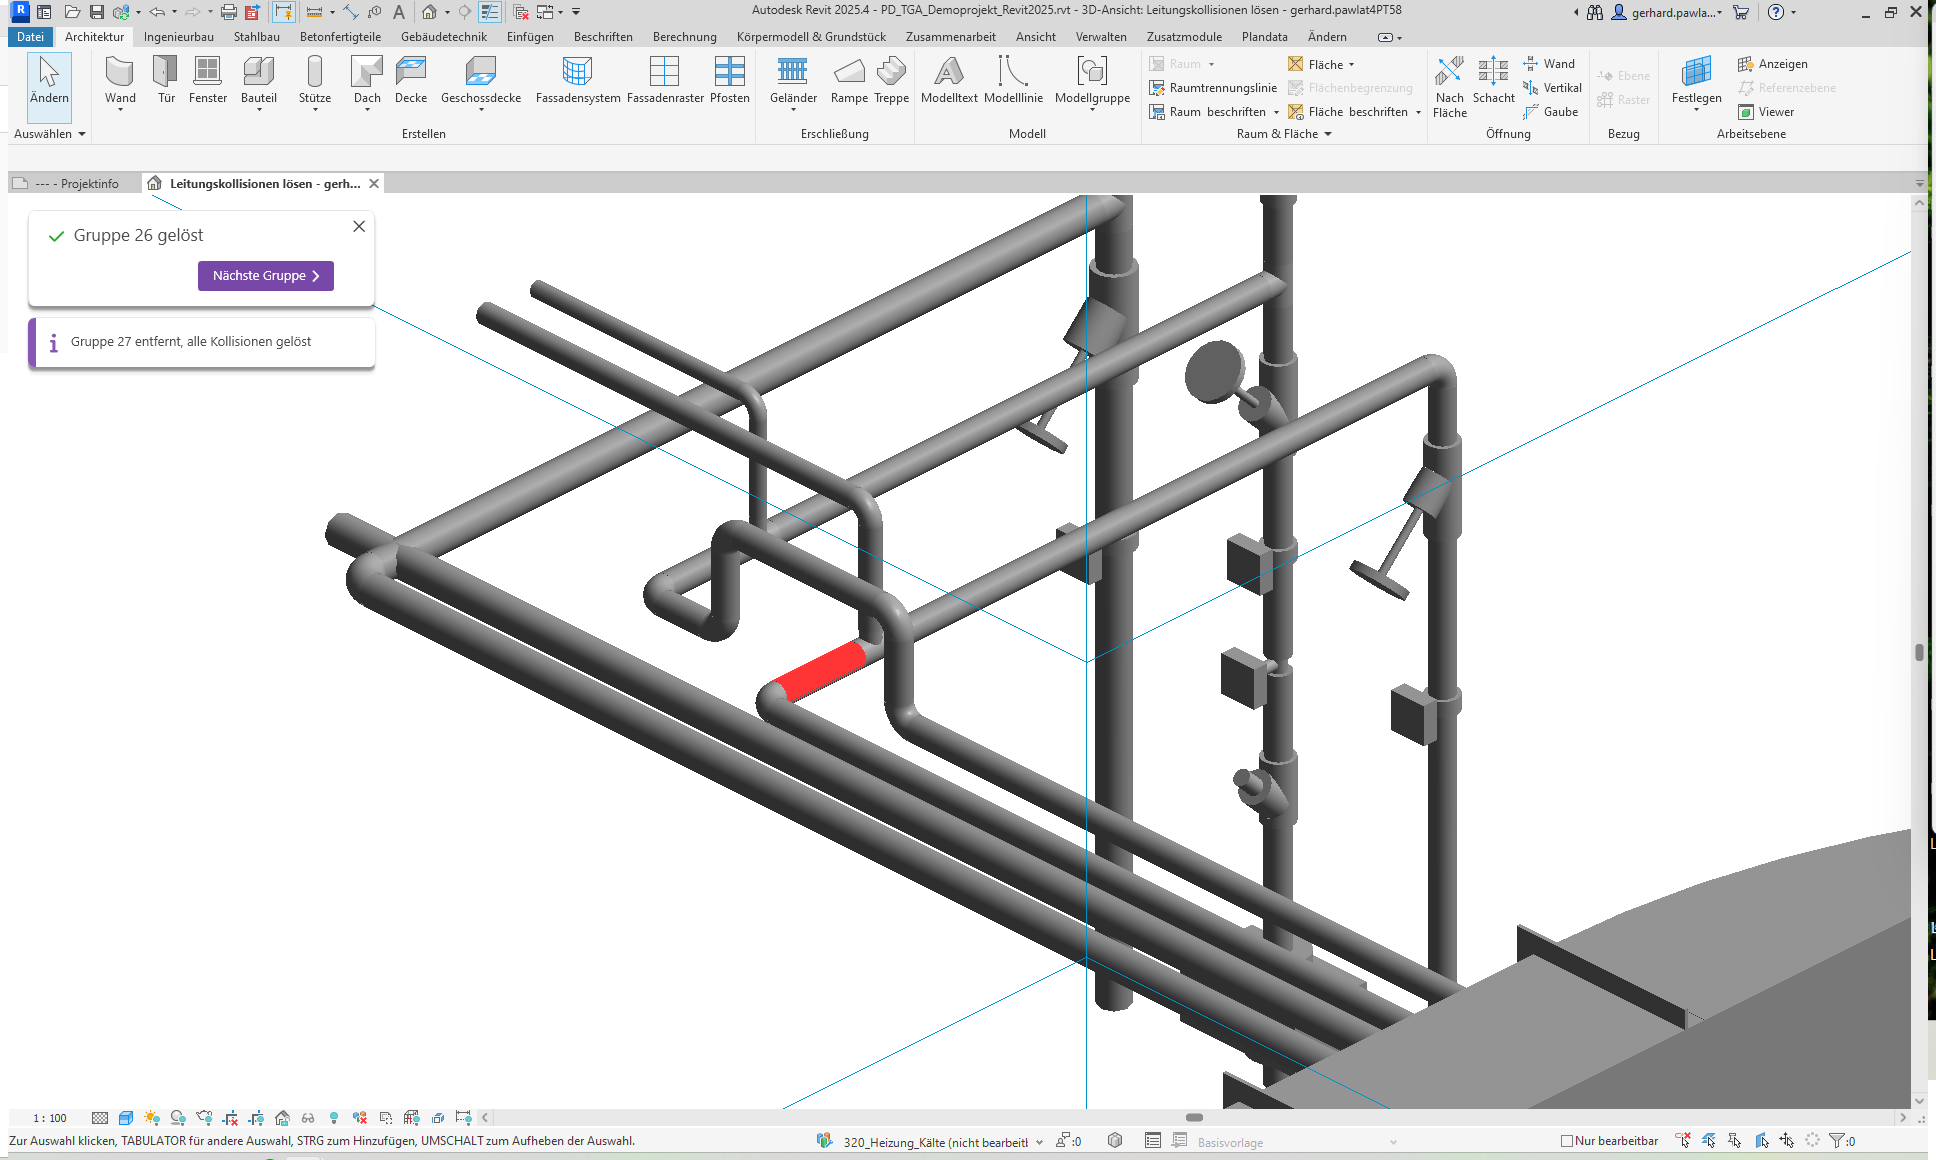
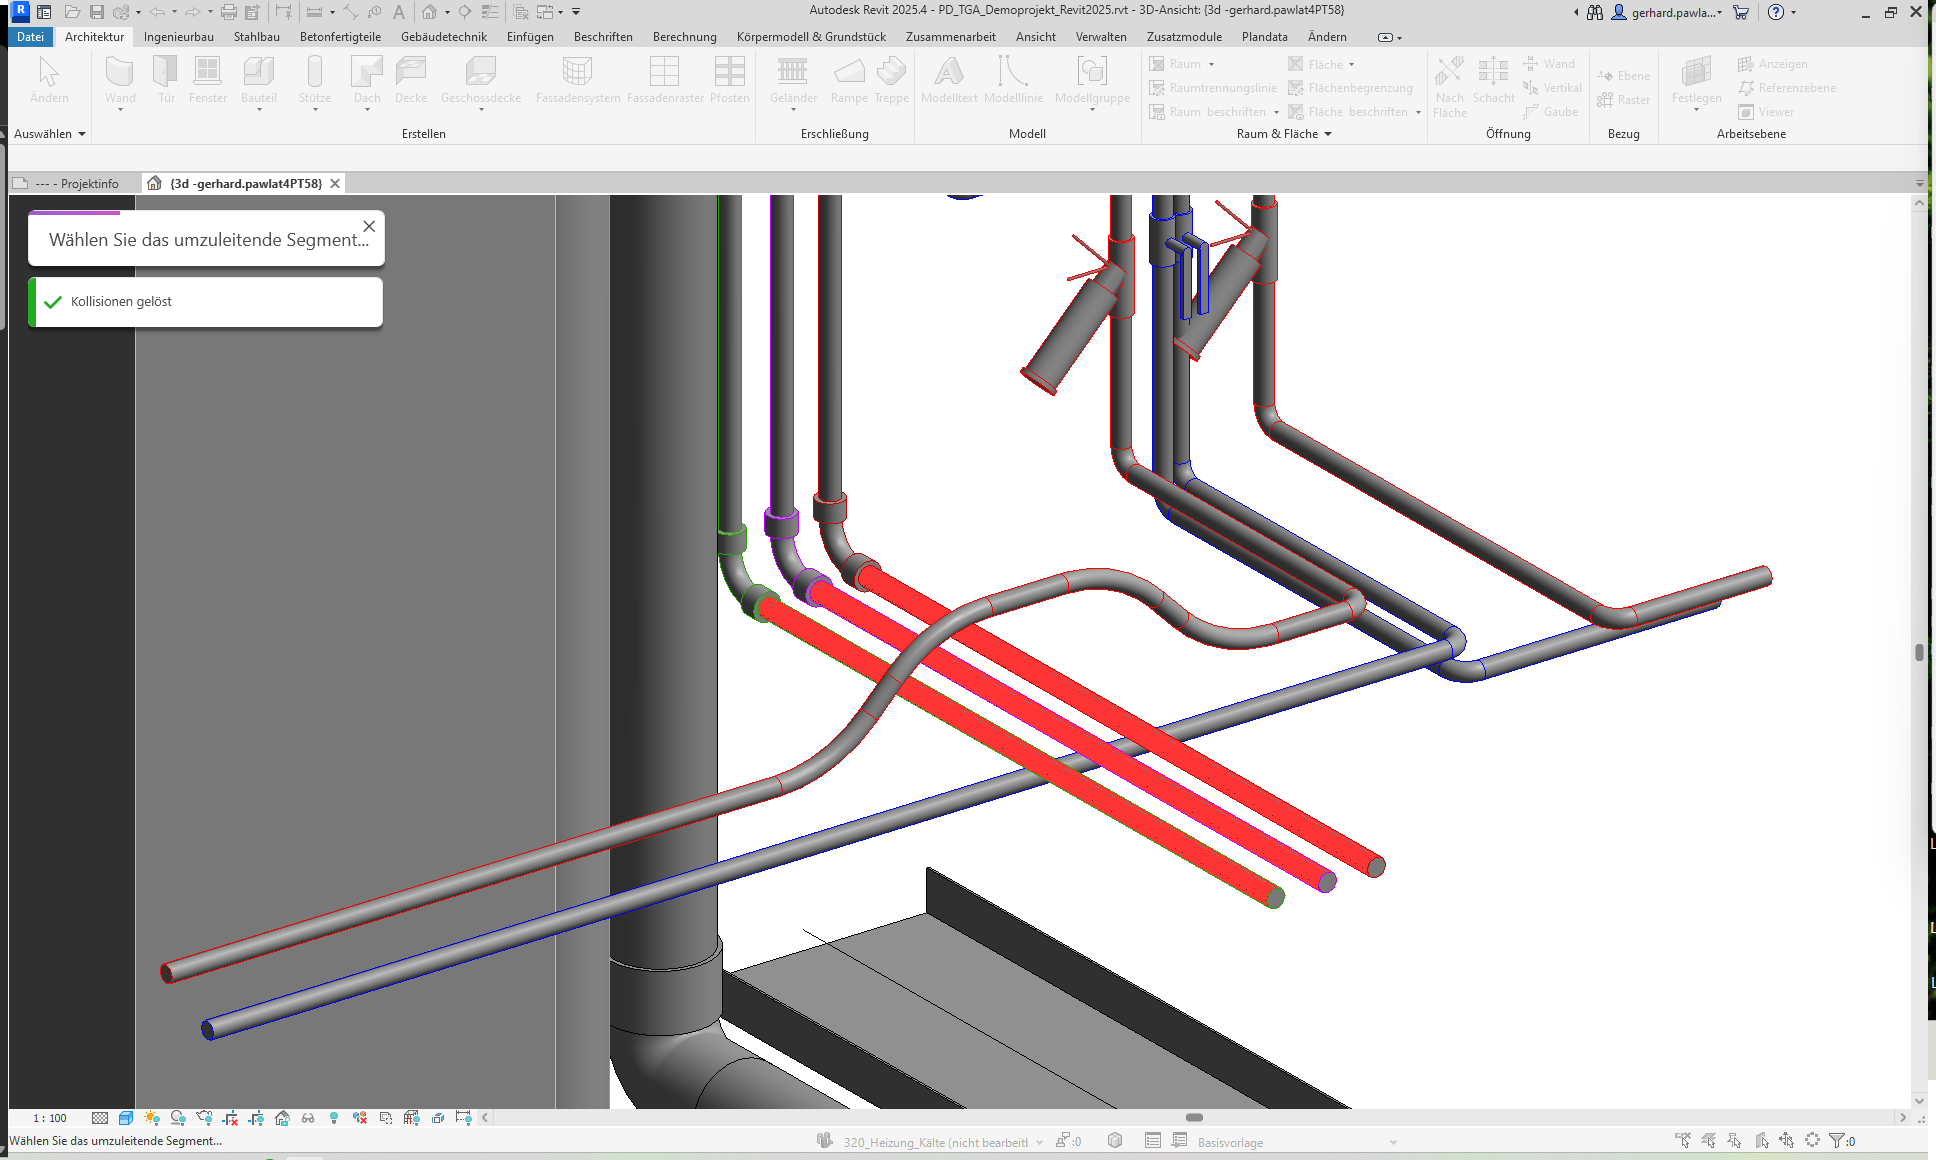
The group is now resolved.

Redeem now
With "Resolve Now," you can select an element directly in a view to resolve its collisions.
- Open a 2D or 3D view in which you want to resolve the collisions.
- Launch the add-in using the "Resolve Now" button
2.5.0.0
- Revit 2026.0 through 2026.4 is now supported.
- The info icon opens the BIMpedia article.
- Pressing the F1 key opens the BIMpedia article.
- Only orthogonal intersections (90° angles) are supported.
- Flex pipes are not supported.
If you have any problems or questions, or if you have any ideas or suggestions, please feel free to contact our customer service team. We look forward to hearing your suggestions for improvement!