In the construction industry, the term "outdoor lighting" refers to the installation of structures containing light sources (commonly referred to as "lights") that provide illumination for ground surfaces, facades, or objects of any kind on a building site.
Depending on the software being used, various object types may be considered for modeling luminaires; however, it is not uncommon for luminaires to be modeled as a combination of other objects (such as columns) in order to allow for more customized designs. To ensure a reliable evaluation, this decision should be finalized for a project; at the very least, such special modeling approaches must be specified in the request for proposals.
Lighting for outdoor areas will not be installed at this stage.
Lighting for outdoor areas will not be installed at this stage.
During this phase, the lighting for the outdoor areas is modeled in 3D for the first time.
Presentation
Floor plan
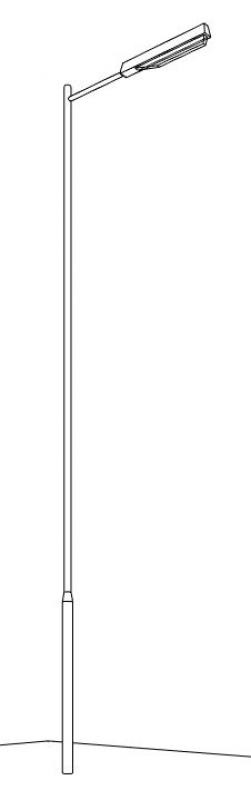
3D model
Features
In this phase, lighting is set up. The necessary features are created through the modeling or generation of the objects:
- General: Name (Lighting designation)
- Generating: Geometry (position, height)
Labeling
The following labels are required in this phase:
- Lighting designation (name)
Instructions
In general, outdoor areas can be lit using the following methods:
- Installing lights on a prefabricated, secured surface
- Installing lights in existing structures (walls, columns, etc.)
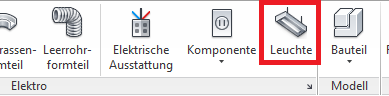
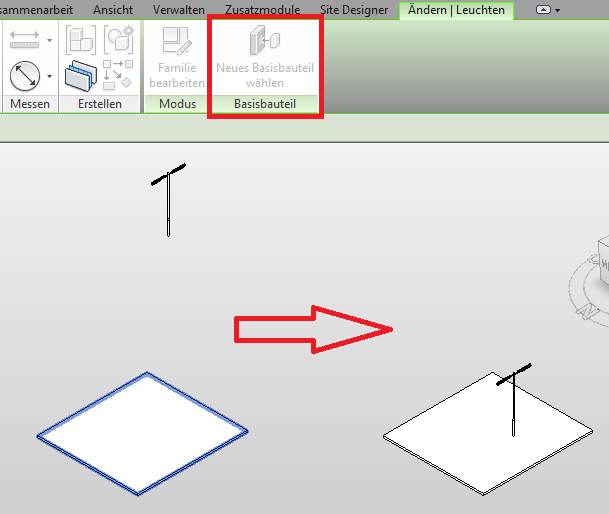
In Revit, lighting fixtures fall under the "Lights" category and are placed using the >MEP >Light command (in the >Electrical command group). Since they do not belong to the system family palette but rather to the so-called external (i.e., “loadable”) families, they must be loaded from Revit Content as needed using the >Insert >Load Family command.
Command for lights:
Command for loading luminaire families:

Classification of luminaire families:
The lighting content included with Revit is divided into outdoor and indoor lighting:
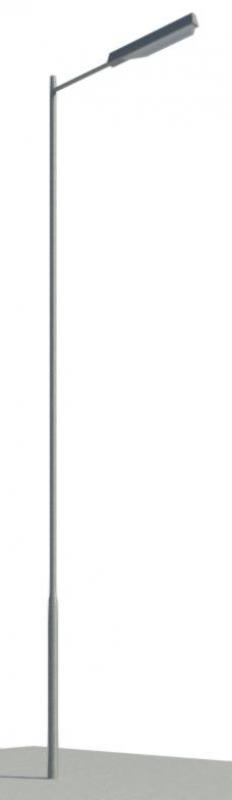
- Outdoor lighting: streetlights, post lights, wall and floor floodlights, etc.
- Interior lighting: floor and table lamps, wall sconces, ceiling lights, etc.
Background:
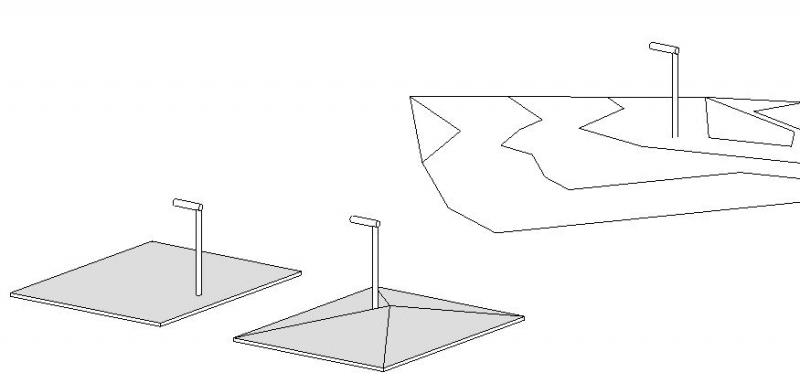
The categories >Floor Slabs or >Topography can be used as the background (base component), and the fixture can be placed in both a floor plan and a 3D view.
The light fixture is placed at a corresponding height depending on the surface of the base component or the level set in the options bar:

If the light fixture needs to be moved to a different surface at a later time, you can use the >Select New Base Component command. If the light fixture is assigned to a base component, it will automatically adjust to the new height if the base component is moved up or down.
Light Source Settings for Renderings
The default light source (the medium that actually emits light), which is found exclusively in families in the 'Lighting' category, can be controlled using the >Light Source Definition command. It is not possible to place a light source in a family from a different category! Furthermore, the light from the light sources contained in the luminaire families can only be made visible in renderings, but not in other view modes (Wireframe, Hidden Lines, Shaded).

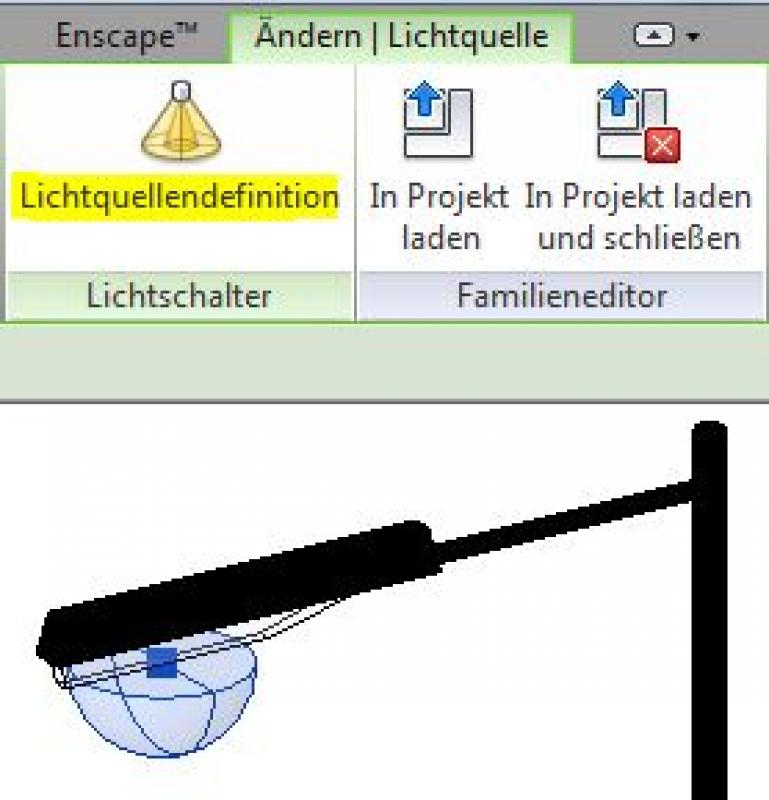
Light source (yellow hemisphere) Light source definition
The lighting scheme >Outdoor: Artificial Only can only be enabled for project renderings after placing families from the Lighting category. Additional settings—such as attenuation (a factor for brightness in the rendering)—can be configured in the >Artificial Lighting... command.
You can read more about luminaires at the following link: Autodesk Help
No further action is required regarding the lighting of outdoor areas at this stage.
During this phase, the lighting for outdoor facilities will be supplemented with the specifications provided by the manufacturers.
Presentation

Floor plan
3D model
Features
The following features will be added in this phase:
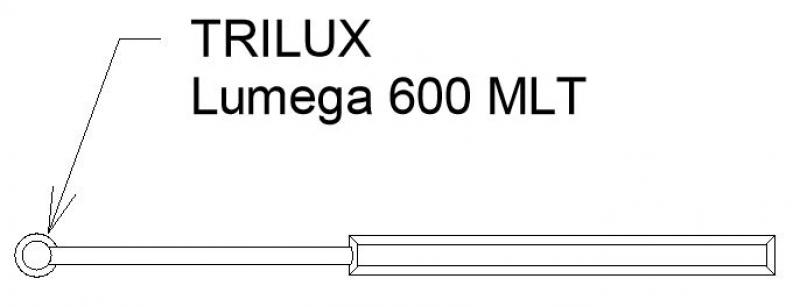
- Manufacturer information: Manufacturer, product name (product number), dimensions, etc.
- Technical: Basic lighting data (intensity, color)
Caption:
Instructions:
These measures primarily concern labeling and are listed in the previous section >Labeling.

Unfortunately, this content is available only to our Pro users.
If you'd like to read the full article, try the Pro account or become a Pro user.